What kind of smiles do we create at Anderson Dentistry? You can see for yourself in the gallery below. If you would like to schedule an appointment with our dentist, Dr. Kipton Anderson, to see what we can do for your dental health and function and your appearance, call our office at 817-485-2111. We offer dental treatments in Colleyville, Texas, for every member of your family starting at age 3 and up.
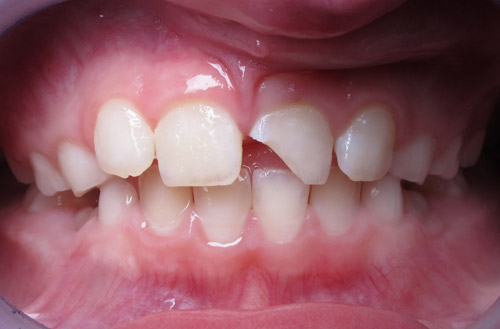
Bonded Composite Restorations
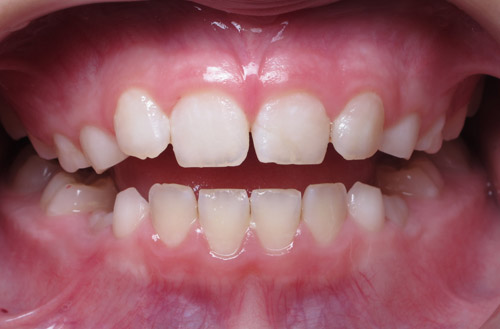
Misshapen front teeth are corrected with bonded composite restorations.
Corrected alignment of front two teeth and reshaped fronts with composite.
Both of the above cases were patients who had misshapen front teeth. They were corrected conservatively with bonded composite restorations.
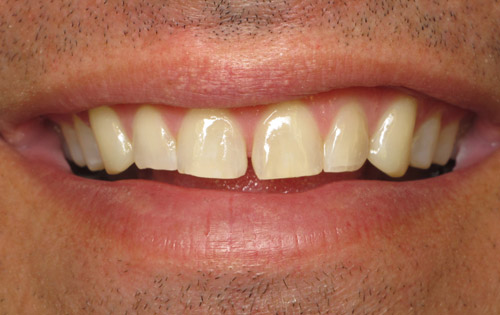
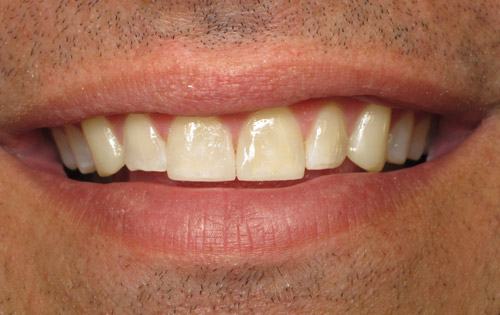
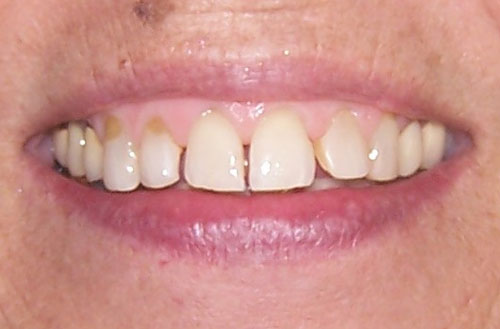
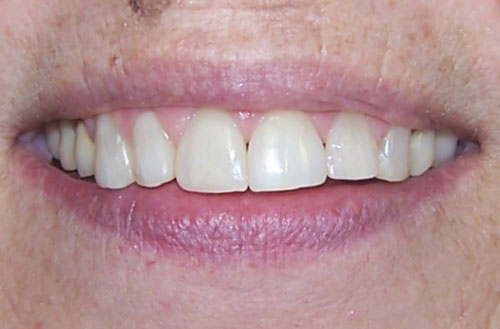
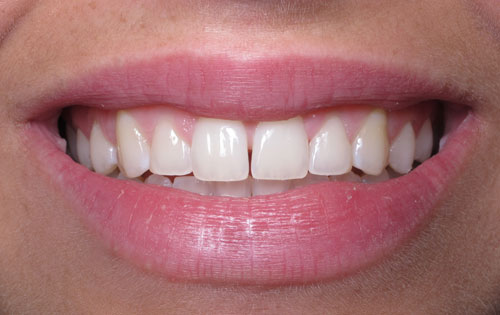
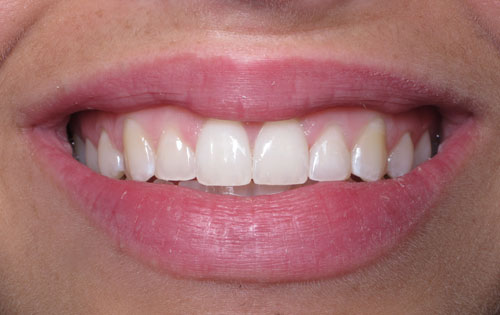
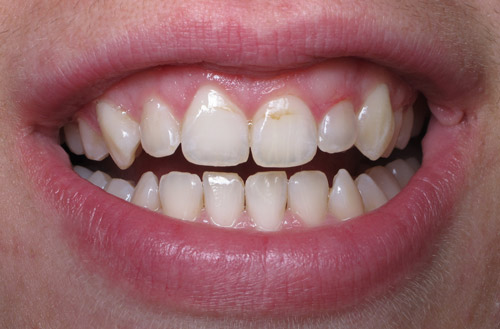
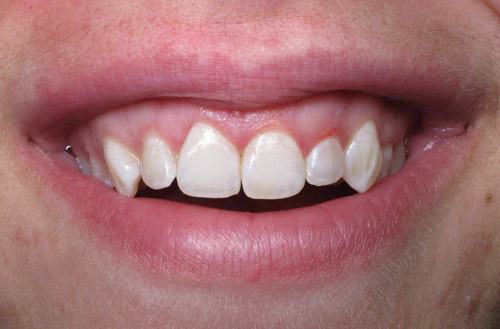
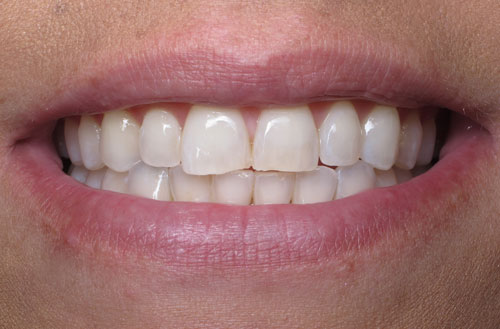
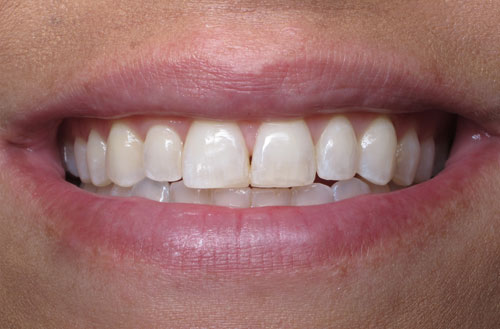
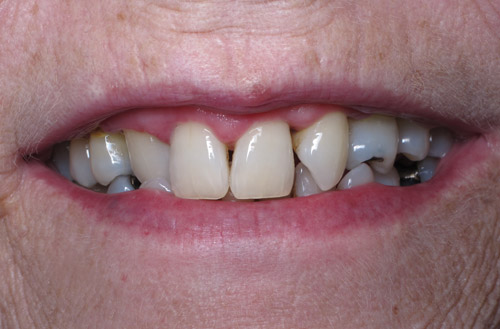
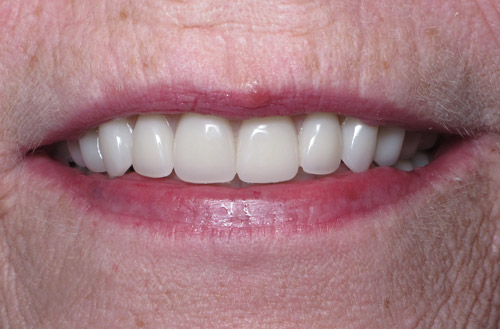
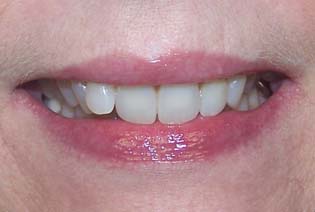
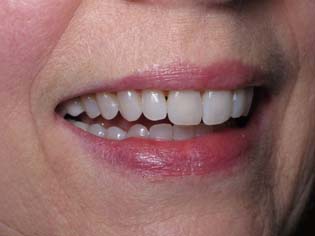
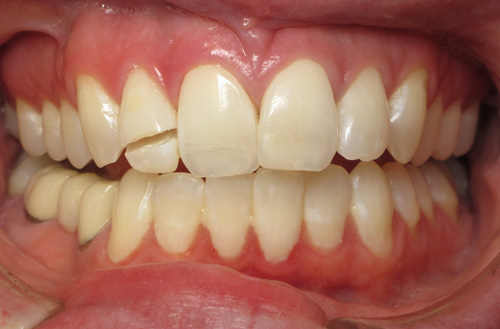
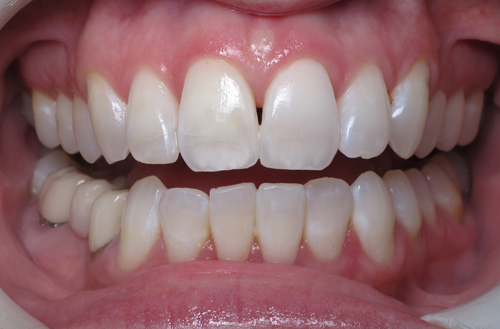
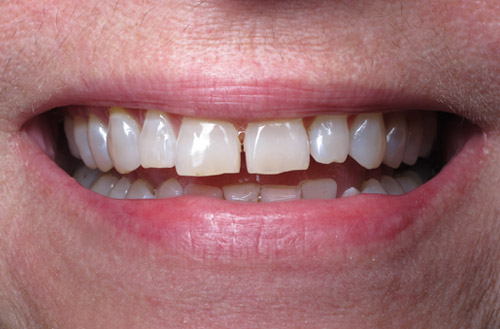
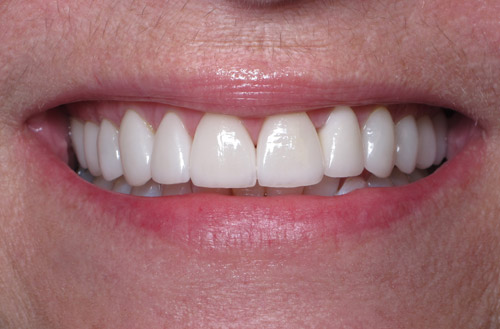
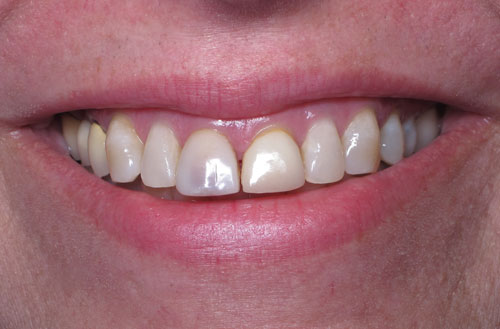
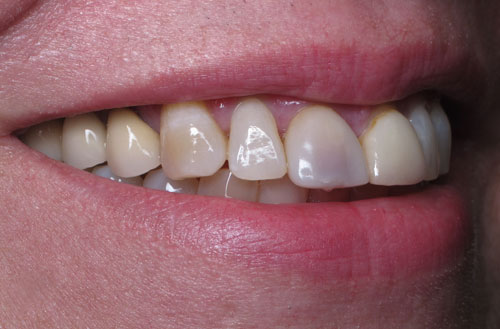
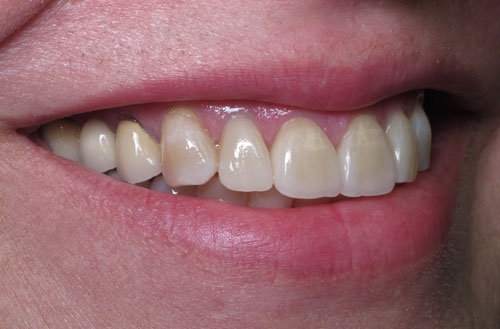
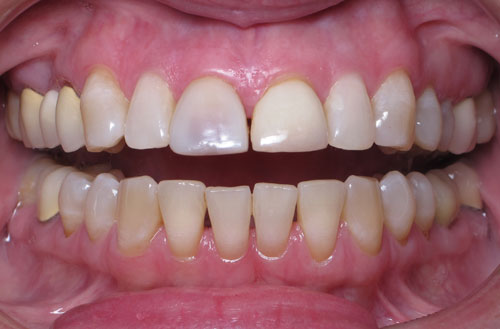
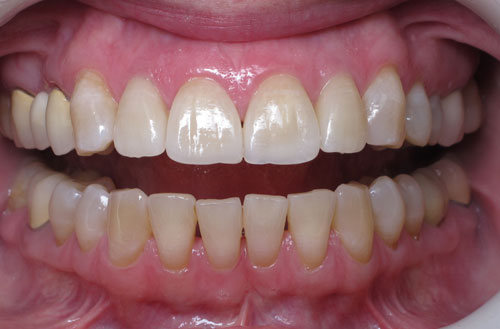
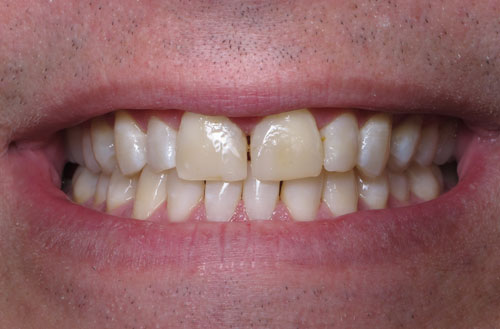
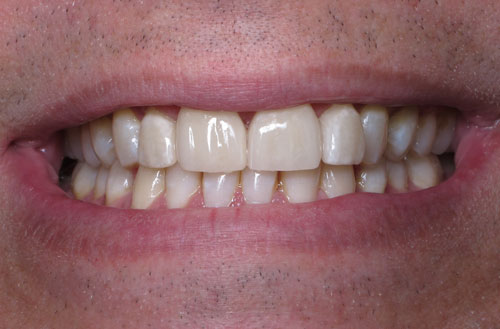
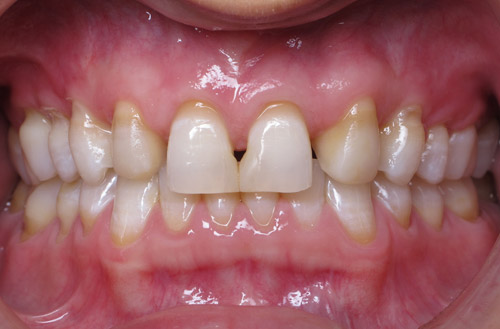
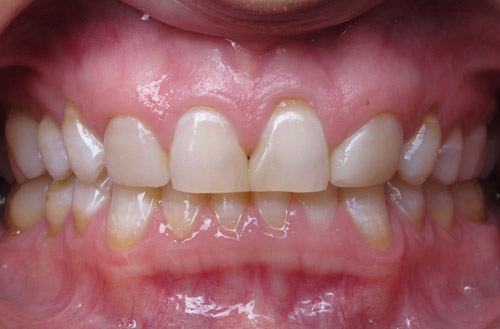
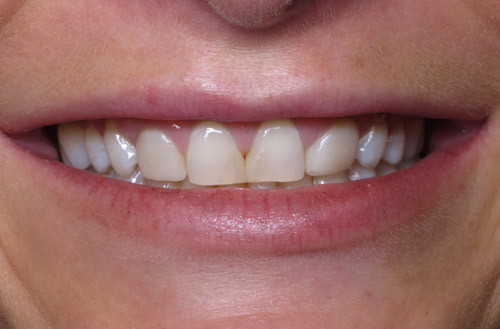
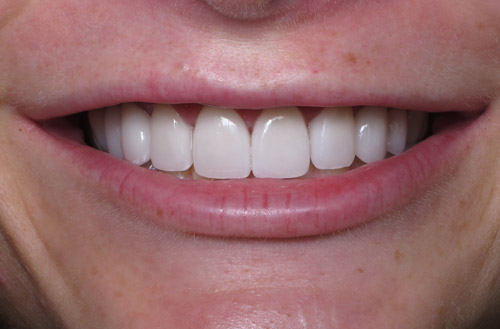
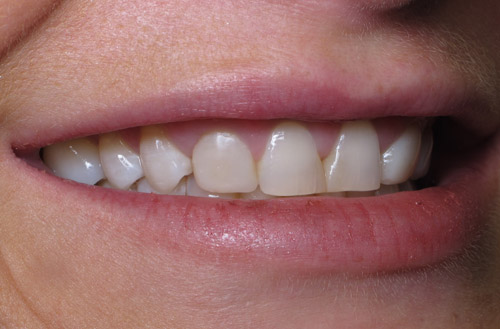
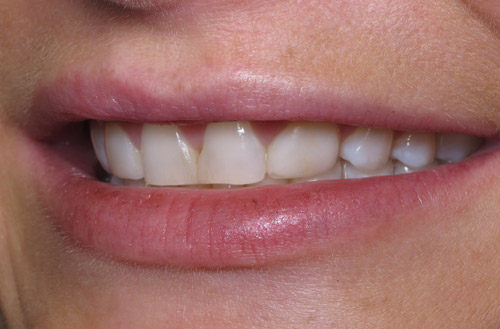
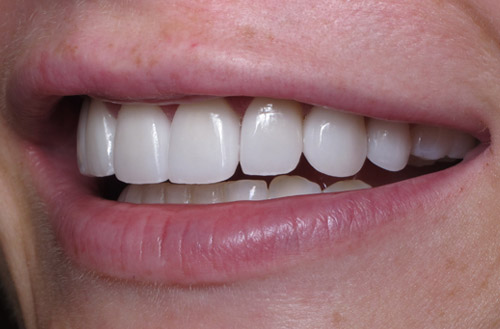
This patient finished orthodontic treatment, but her front two teeth were too small, thus leaving an unsightly gap. The space is easily corrected in about half an hour by adding composite restorations between the teeth.
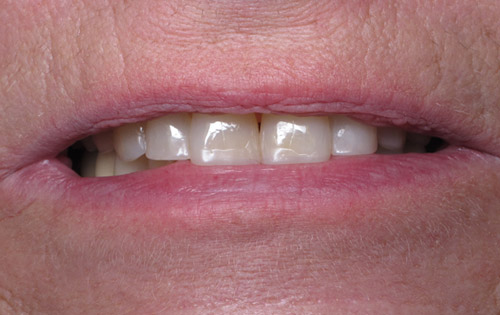
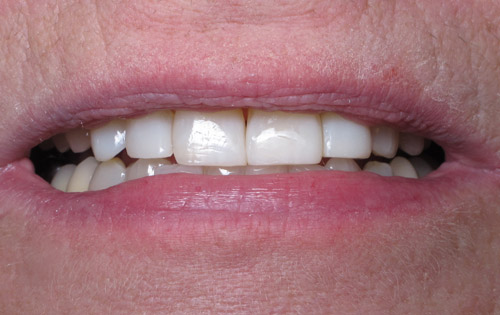
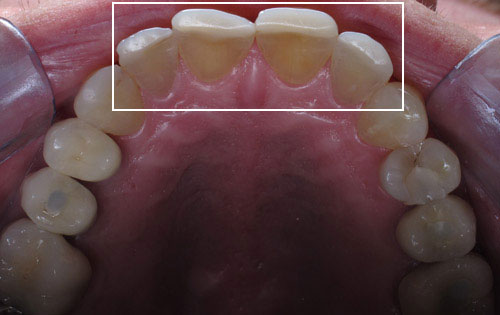
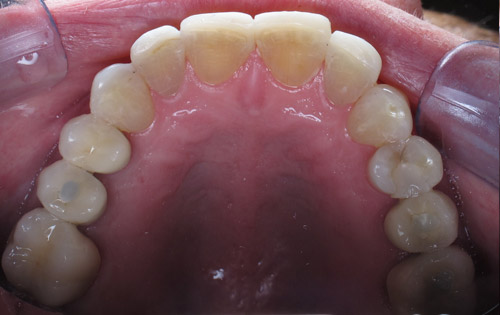
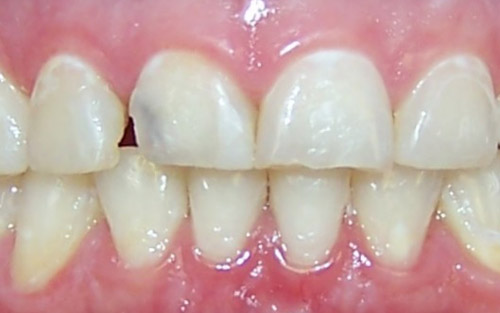
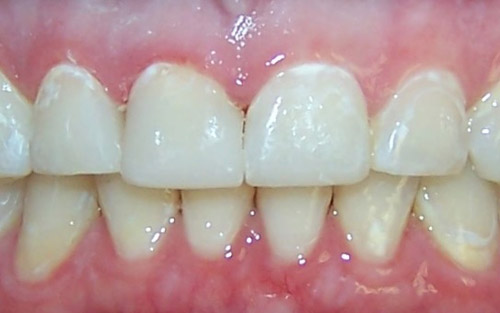
Above, we have permanent brown stains embedded in the front two teeth. The discoloration was removed and restored conservatively with composite resins.
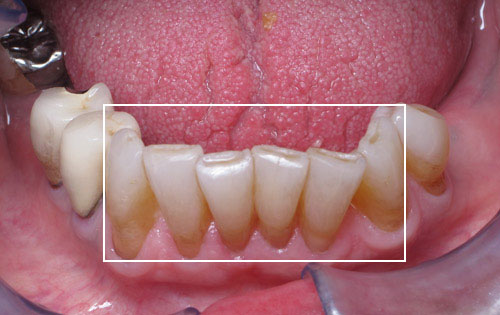
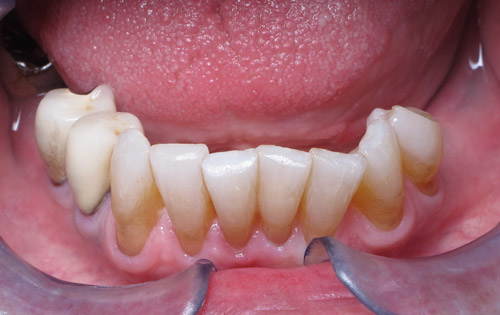
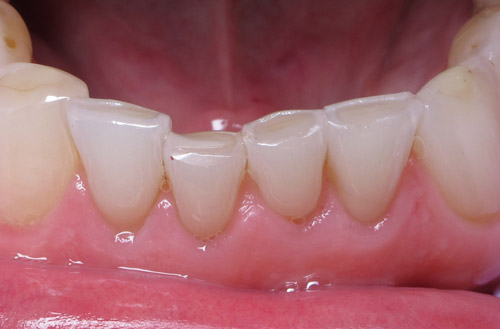
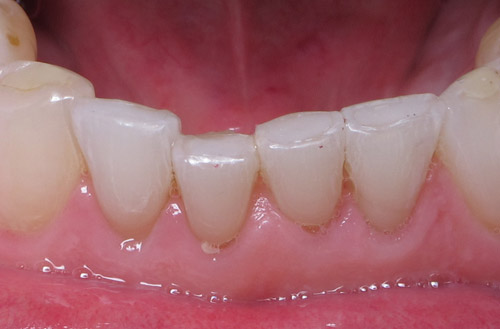
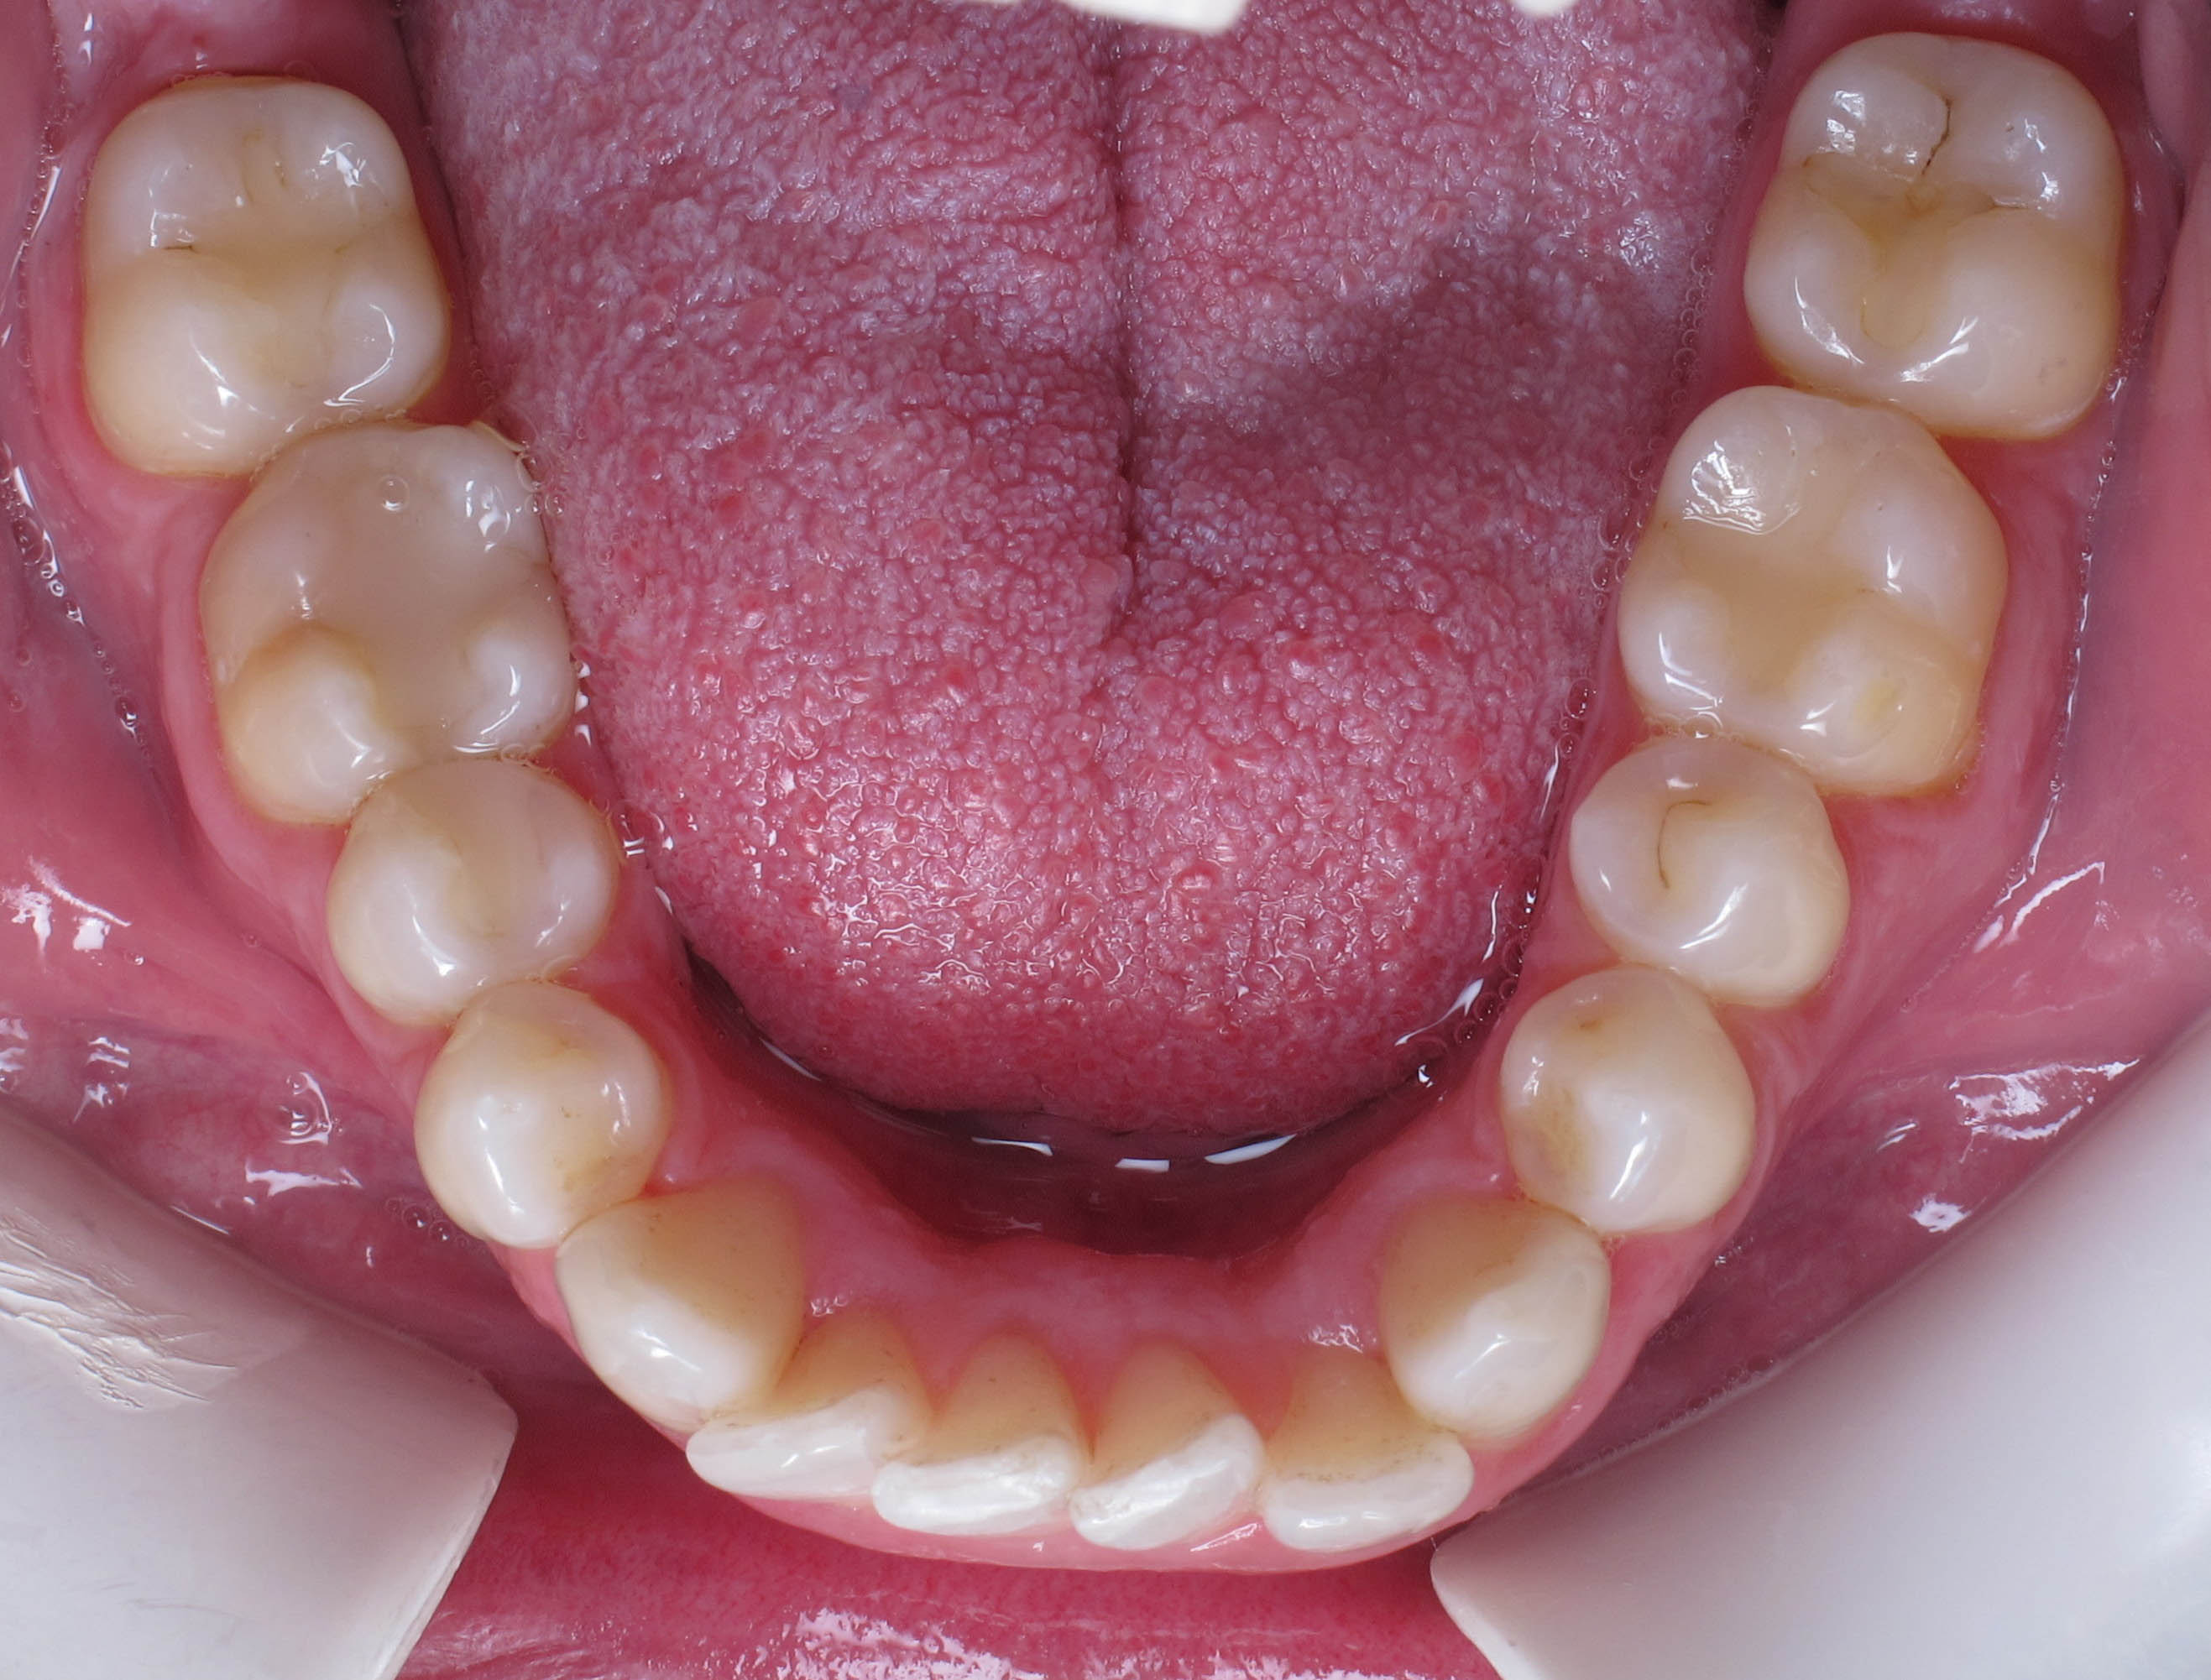
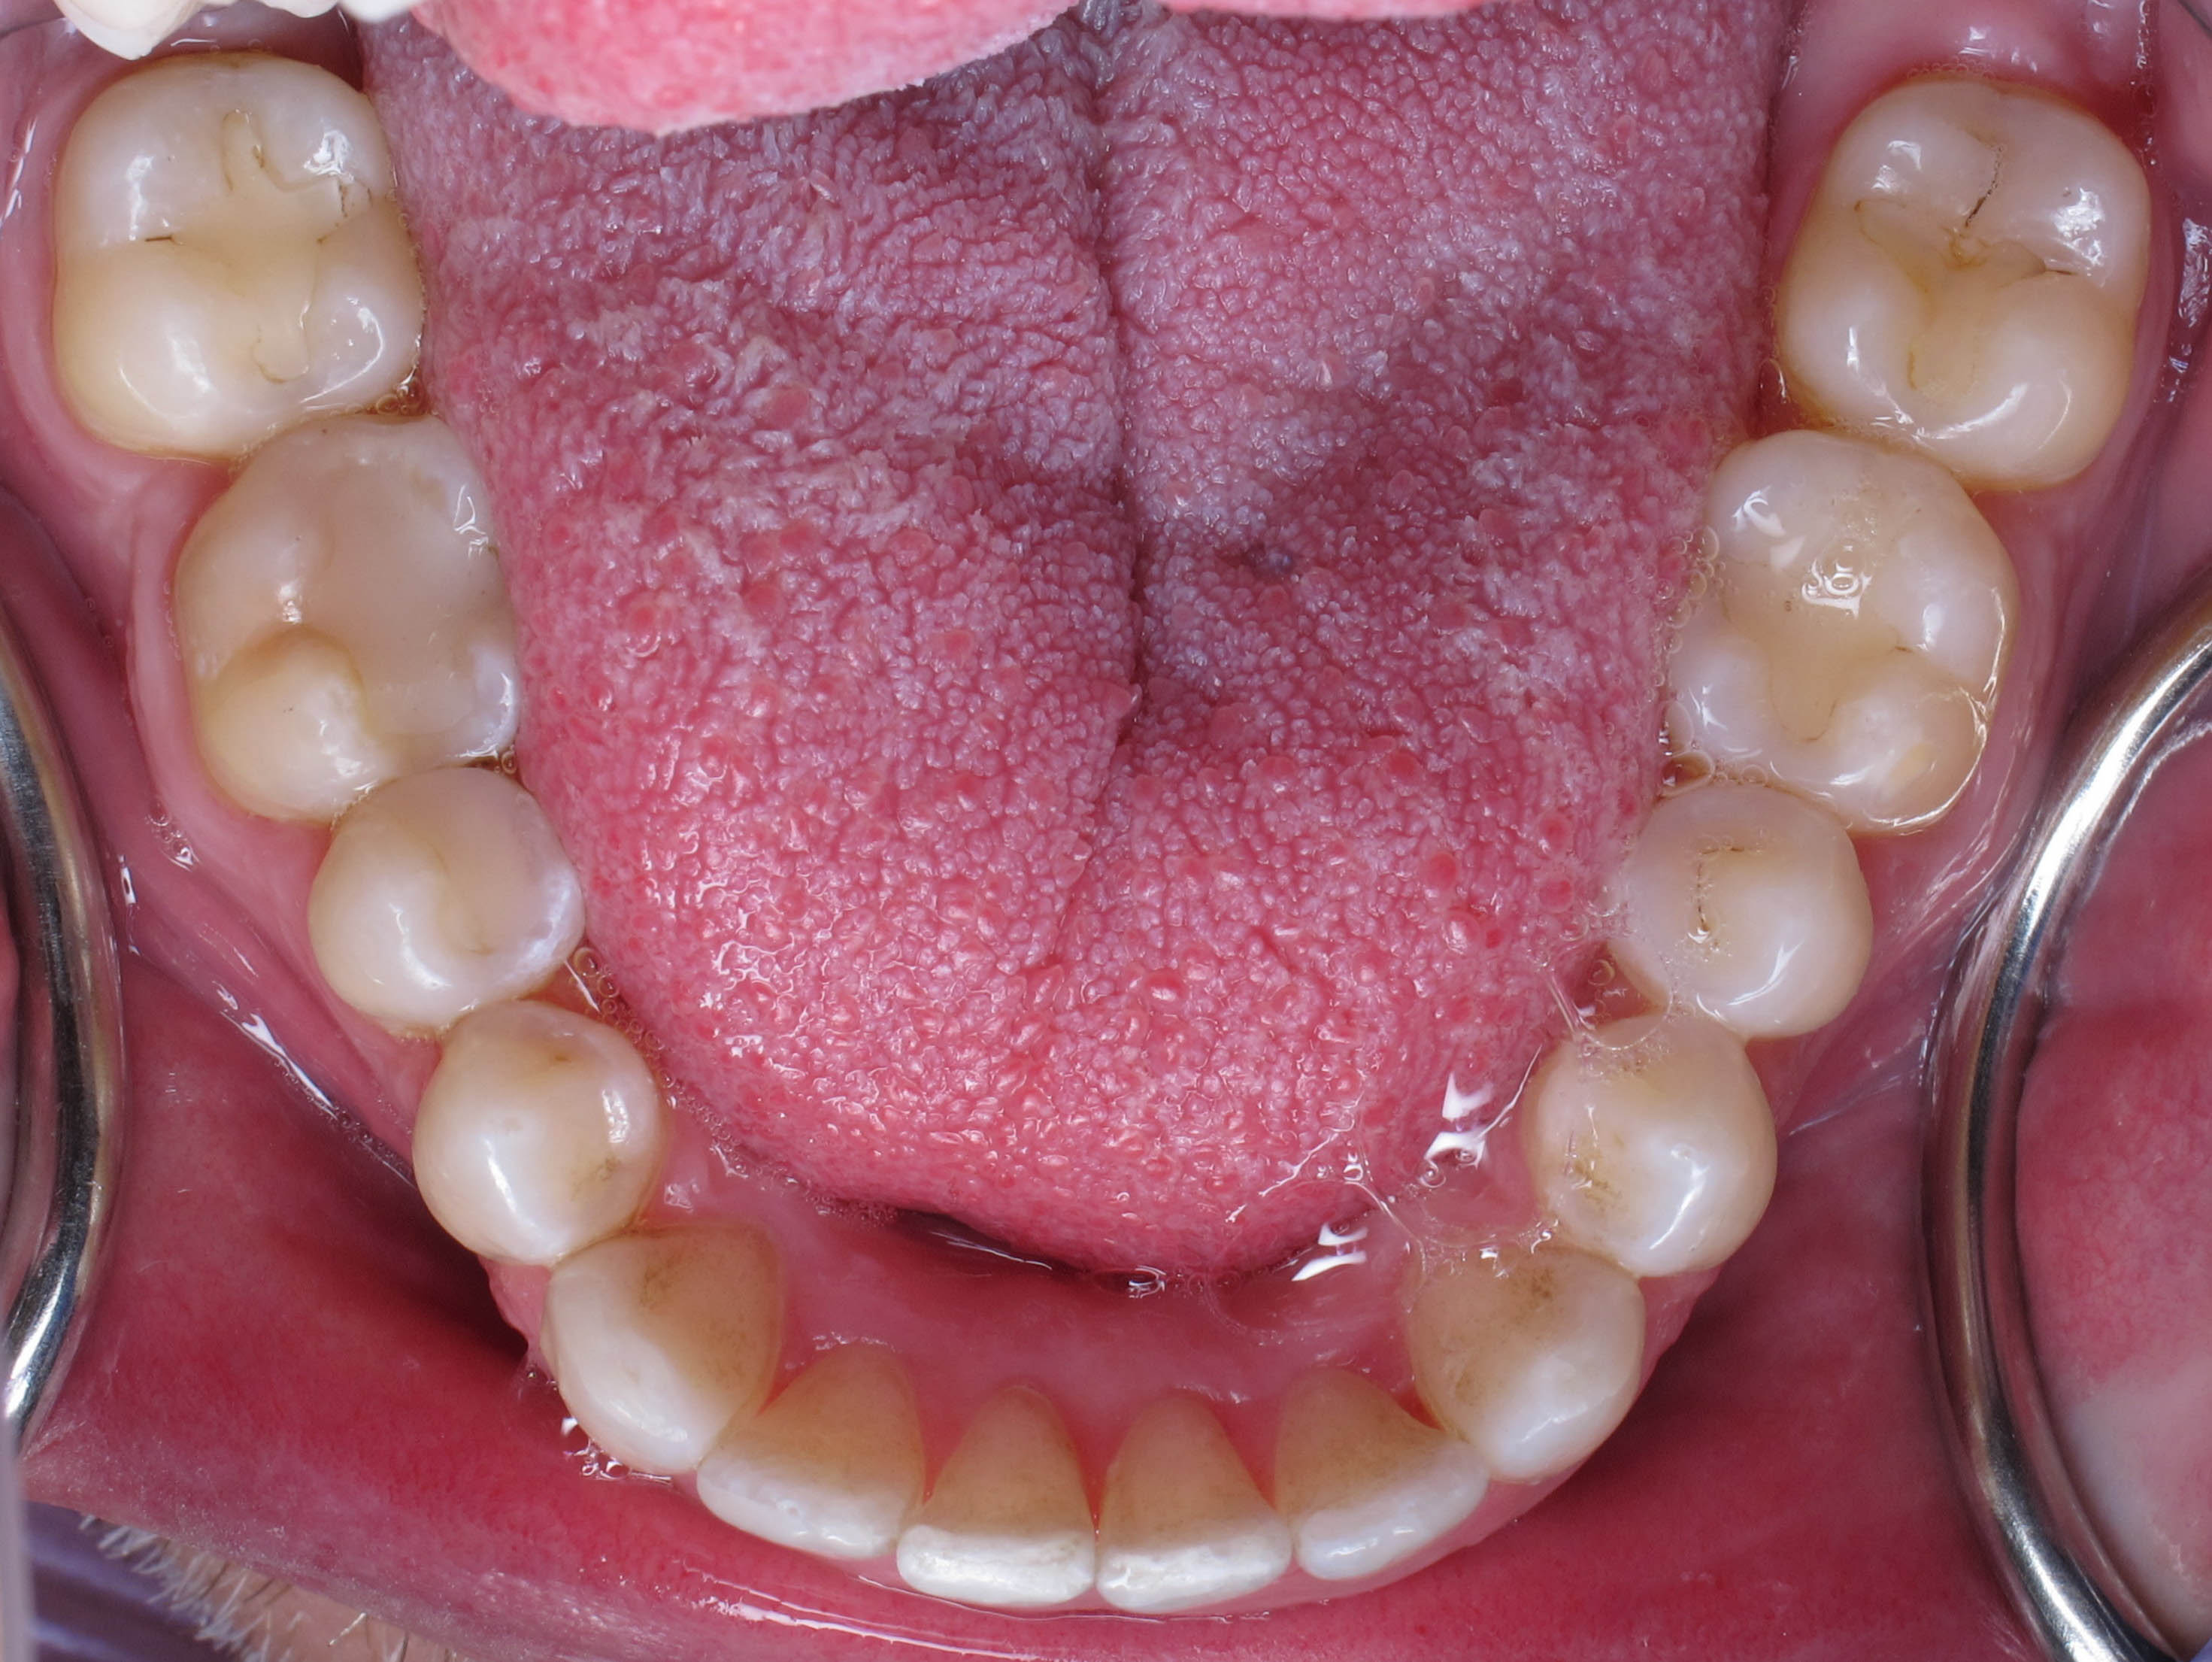
Lower Teeth
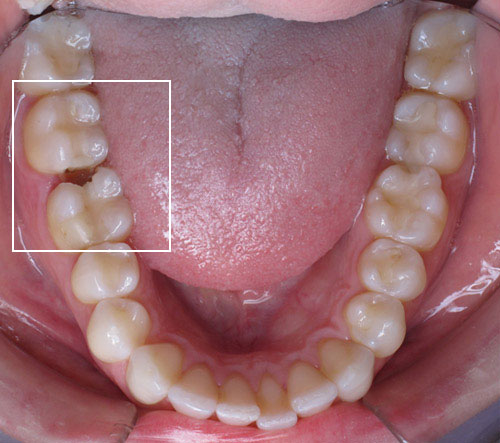
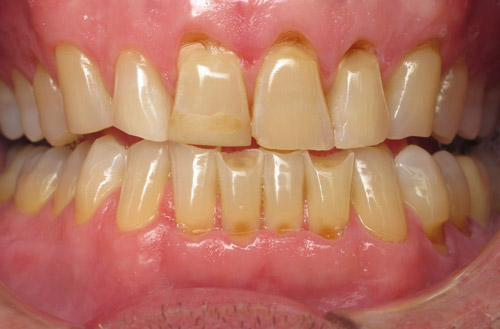
The lower front teeth had been extensively worn in this individual. They were strengthened by bonding composite on the lower anterior teeth.
Anterior Bonding
Build-Up
Used to restore a workable shape before crown placement.
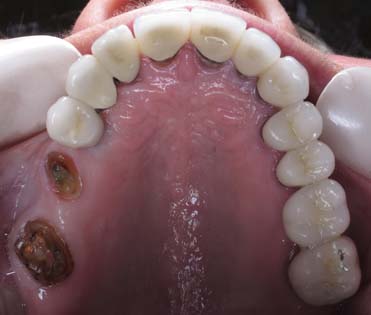
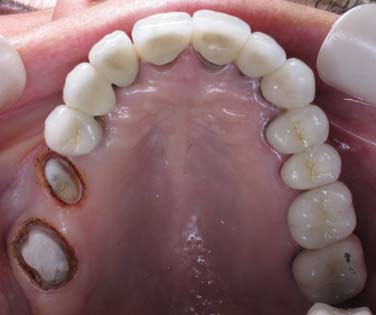
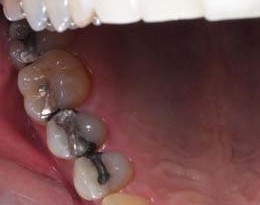
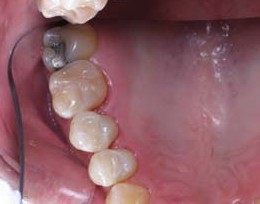
What is a build-up? Why do dentists sometimes charge this fee when a crown is done?
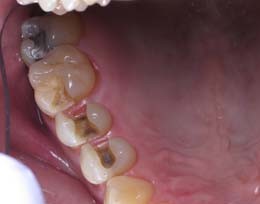
A build-up is used to restore a workable shape to a badly broken down tooth prior to placing a crown over it. Not every tooth that needs a crown needs a build-up. This is a case of two teeth that supported a bridge for 20 years before the cement seal finally broke between the bridge and the tooth roots. Over time, the teeth decayed under the previous crowns. Fortunately, enough tooth remained after being cleaned up to support a build-up on the two teeth and a new bridge. The darkness around the teeth is from the use of a dental laser, which cauterizes the tissues around the tooth and allows for a dry environment to ensure no moisture interferes with the bonding procedure. This will heal and look normal again after several days.
Children
Teeth are saved from cavities with composite restorations.
Yes, we work on children!
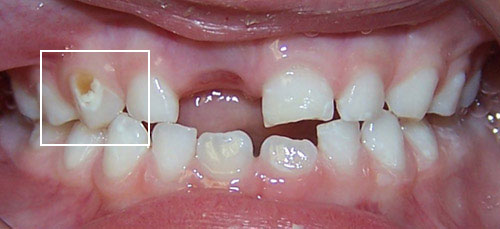
Case #1
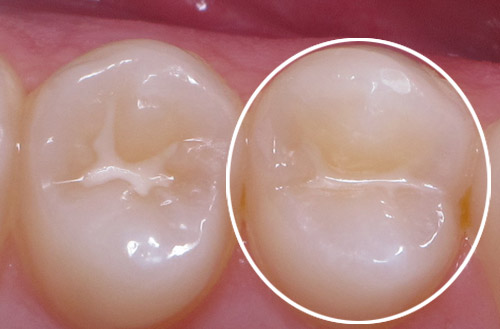
This is a 6 year-old with a big cavity on her tooth! It was fixed with a composite restoration, and the tooth was saved.
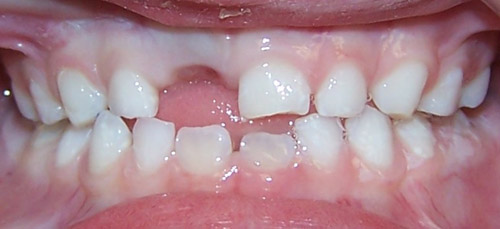
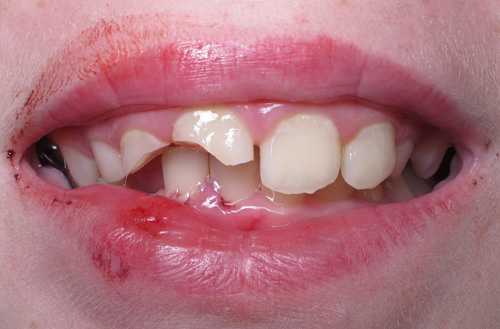
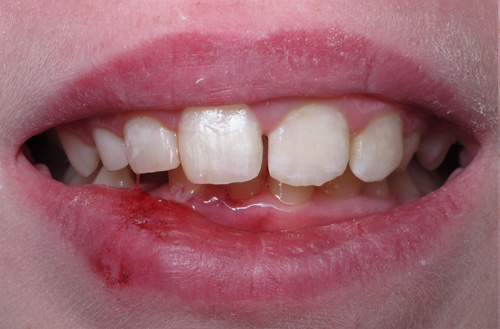
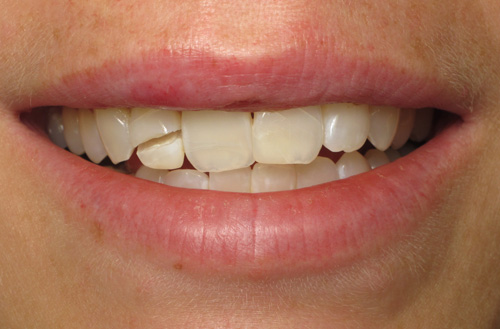
This young man broke his front tooth of on the side of a swimming pool. Part of the tooth was put back in place with adhesive while the rest was restored with bonding.
Crowns
Well-designed restorations straighten and seal the teeth.
Case #1
Here is a case where two well-designed restorations straightened and sealed the damaged portions of the front teeth.
Case #2
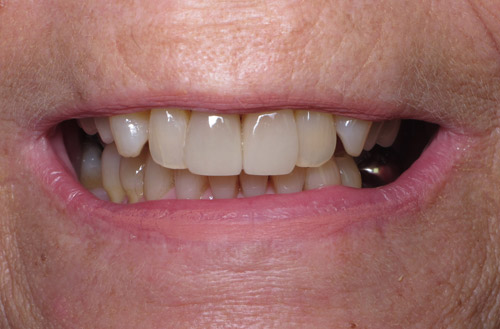
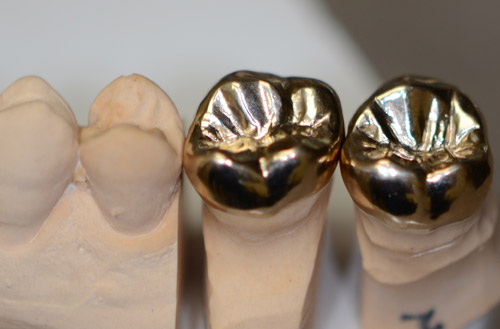
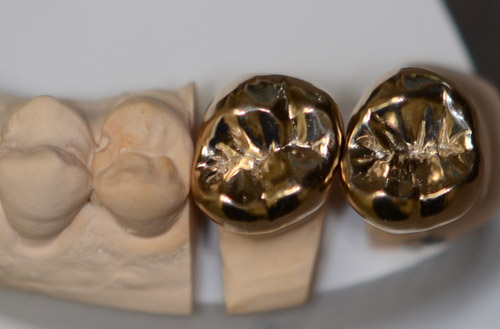
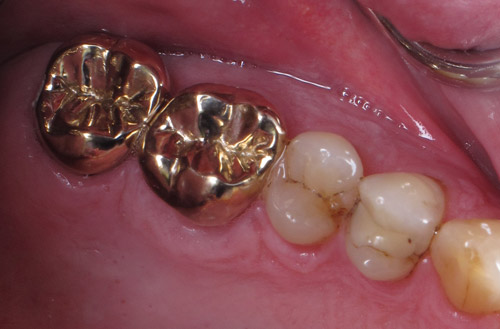
Yes! Gold crowns are still being done! While not for everyone (for aesthetic reasons), gold is arguably the best long-term restoration for damaged teeth that require some type of coverage. Natural teeth can crack, and so can ceramics. Using a gold restoration avoids this problem and can be a great choice for posterior teeth. Be aware that many dental offices use inexpensive alloys to cut costs. We use the best available materials to prevent metal allergies and unnatural wear of opposing teeth. It is not uncommon to see patients with gold restorations placed in posterior teeth that have lasted 30 to 50 years or longer.
Case #3
A typical crown in our practice.
Case #4
A naturally colored and shaped crown to restore a tooth with a large filling and a crack.
Case #5
Front teeth cracked and broke off after a fall. The front four teeth were restored with ceramics.
Crowns & Implants
A missing tooth is replaced with a dental implant and crown.
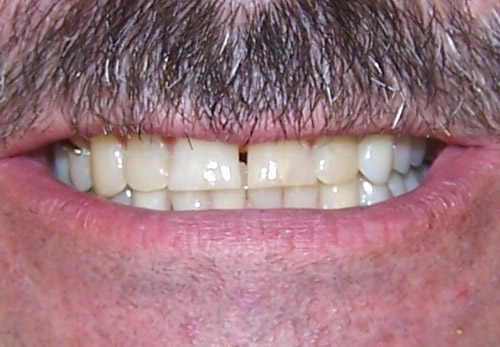
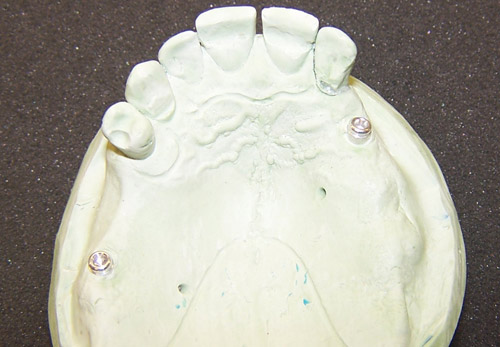
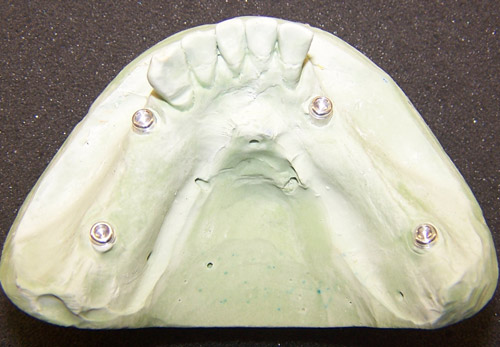
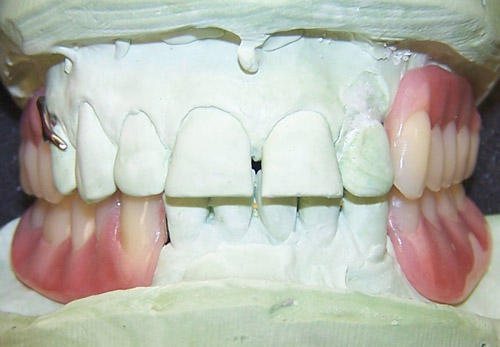
Dentures
Problem teeth are replaced with great looking dentures and secured by implants.
Case #1
We had so much fun doing this case! Not only does she love to give our dentist a hard time, but she is just a blast to work with, too. Unfortunately, she had lost a lot of teeth over time, but she is now enjoying her new smile. The upper is a denture, the lower is an implant-retained overdenture.
Case #2
This wonderful lady has had problems with her teeth all her life. They were replaced with a great looking set of dentures and later secured by eight implants placed by our dentist.
Case #3
Fillings
Teeth are restored after old fillings fell out of place.
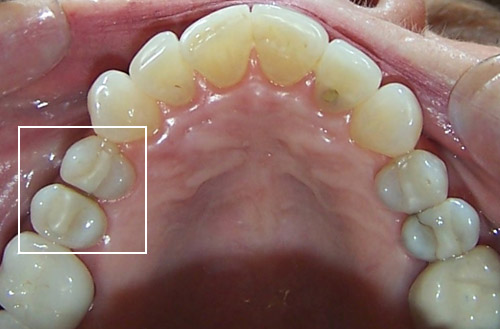
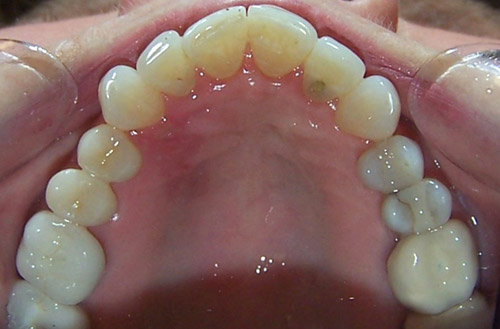
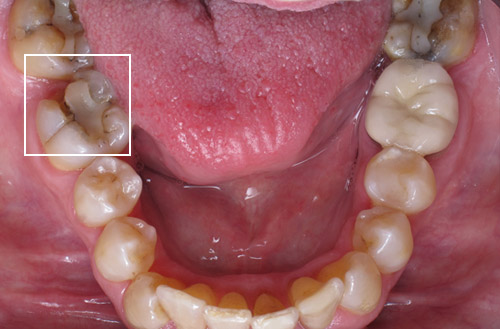
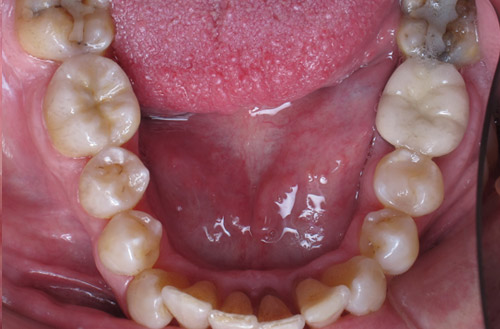
Two Left Molars
The Before photo shows two molars that had previous fillings that had fallen out when the patient came to our office for help. The After photo shows the restored teeth.
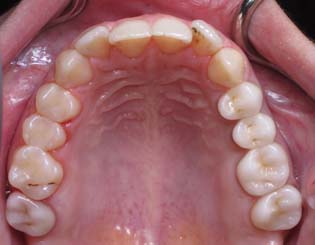
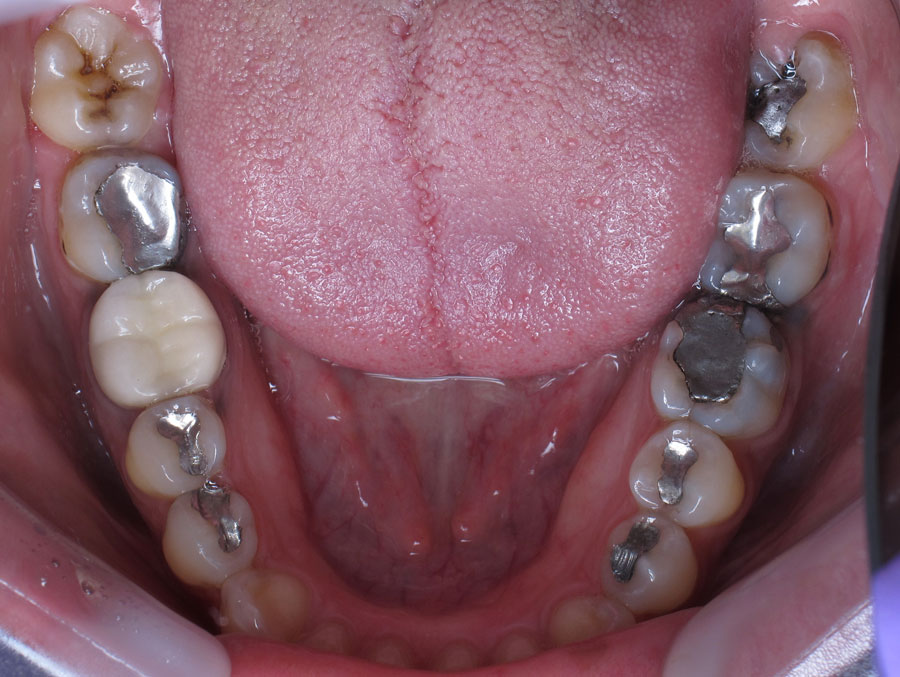
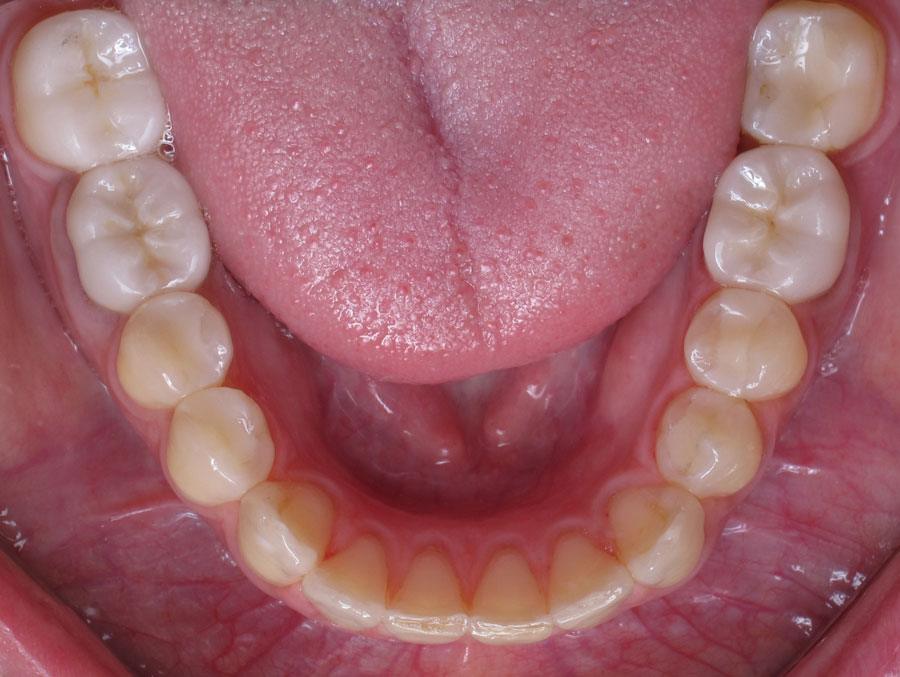
Replace Old Metal Fillings
Fillings & Crowns
Build-up prior to placing a crown.
Case #1
This patient has had her back teeth restored with fillings and crowns. She will use Invisalign® clear aligners next to straighten her front teeth, then the front teeth will be restored. By delaying treatment until the teeth are straight, we have better access to the problem areas and can be more conservative with the treatment!
Case #2
Restoration of damaged teeth with new crowns where necessary and fillings. Wisdom teeth were removed.
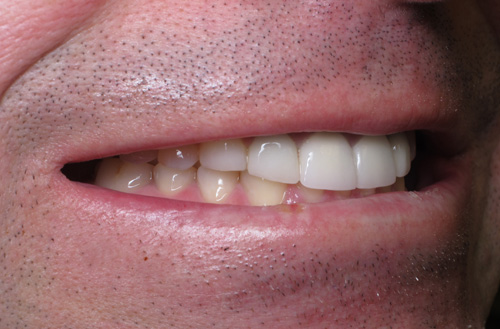
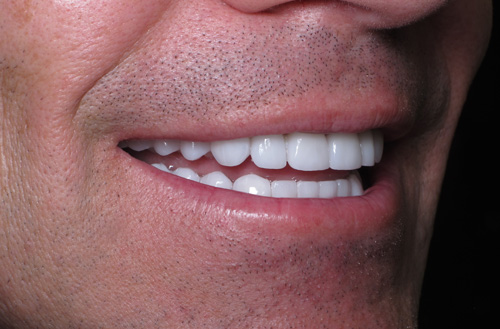
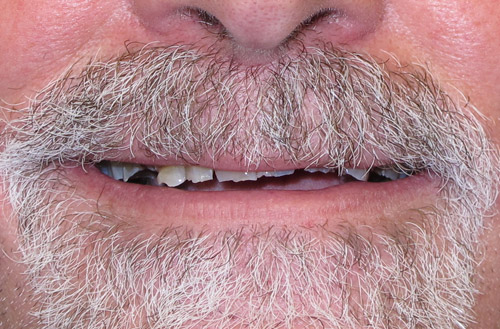
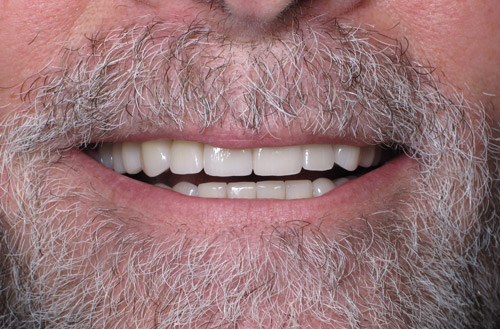
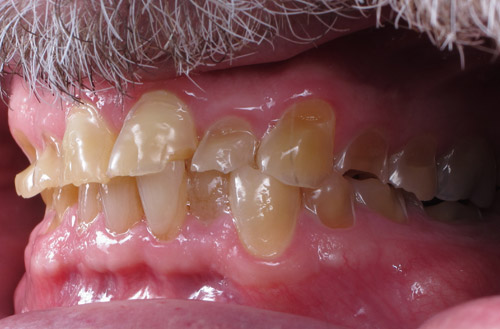
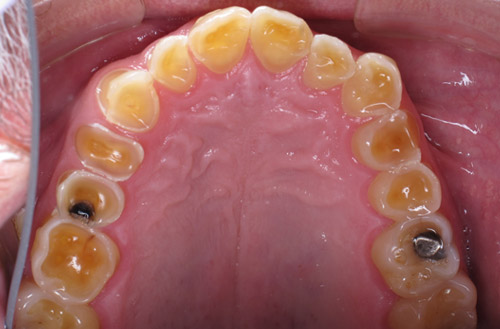
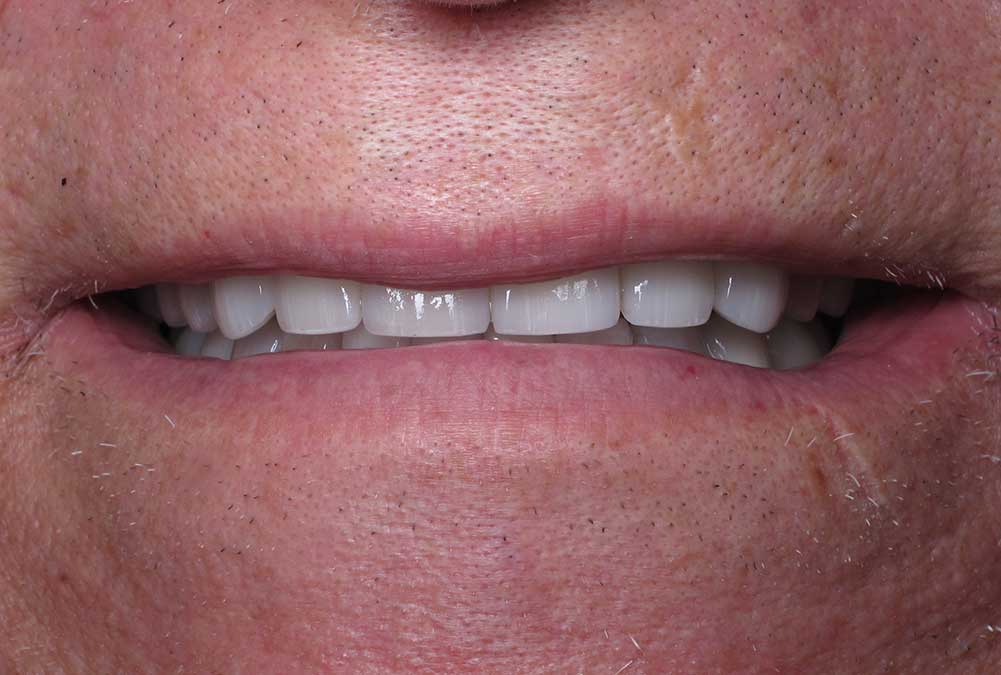
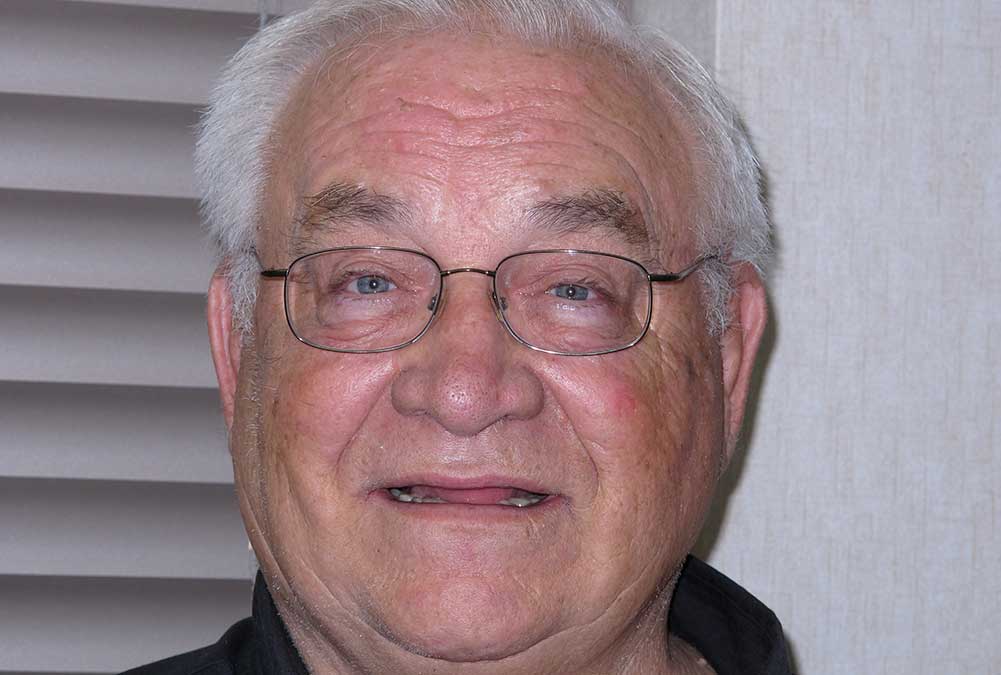
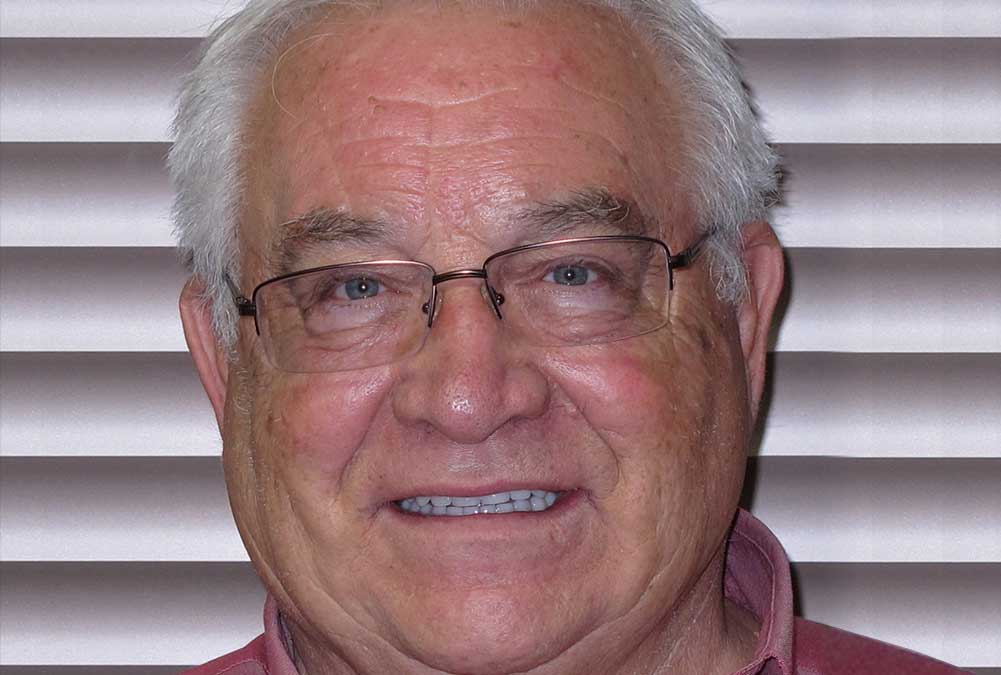
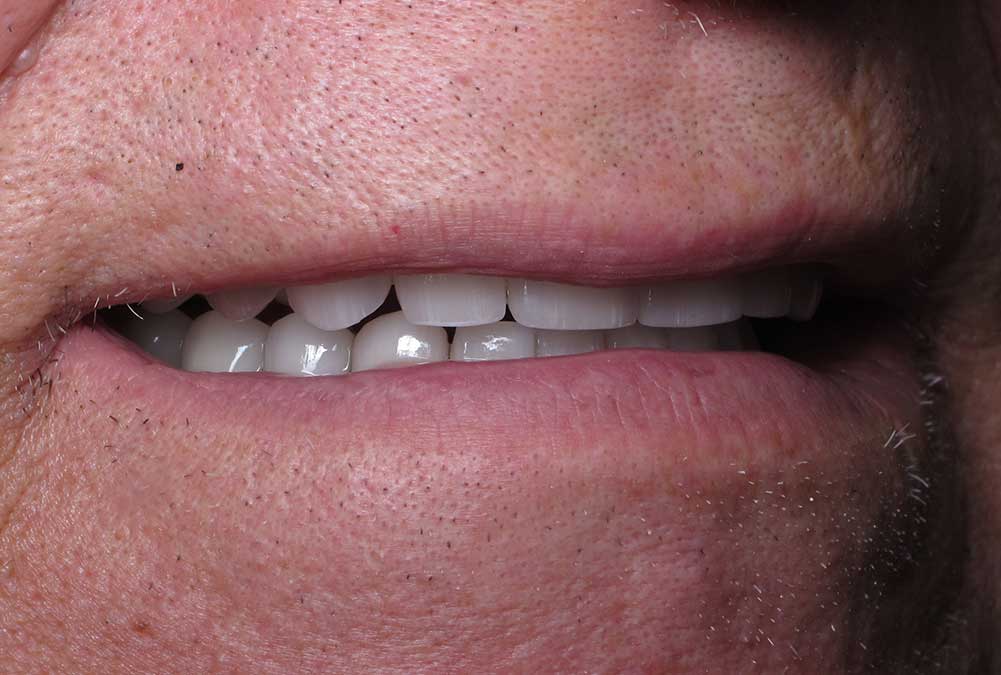
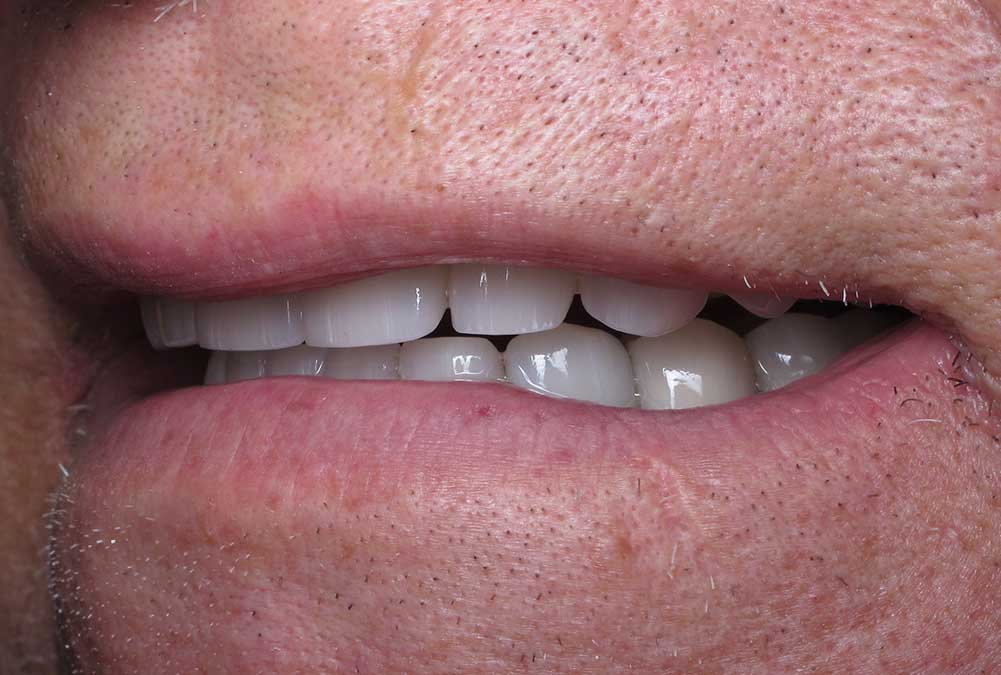
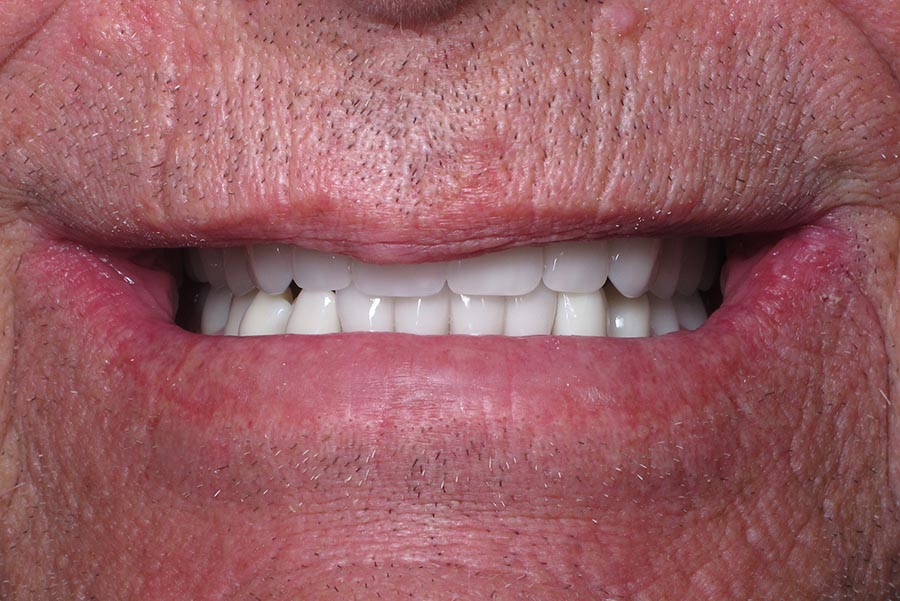
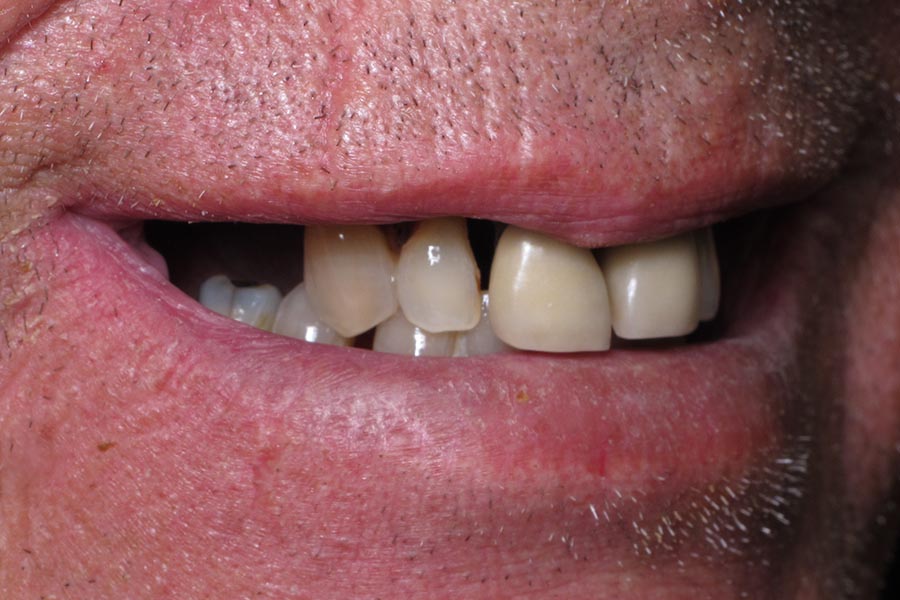
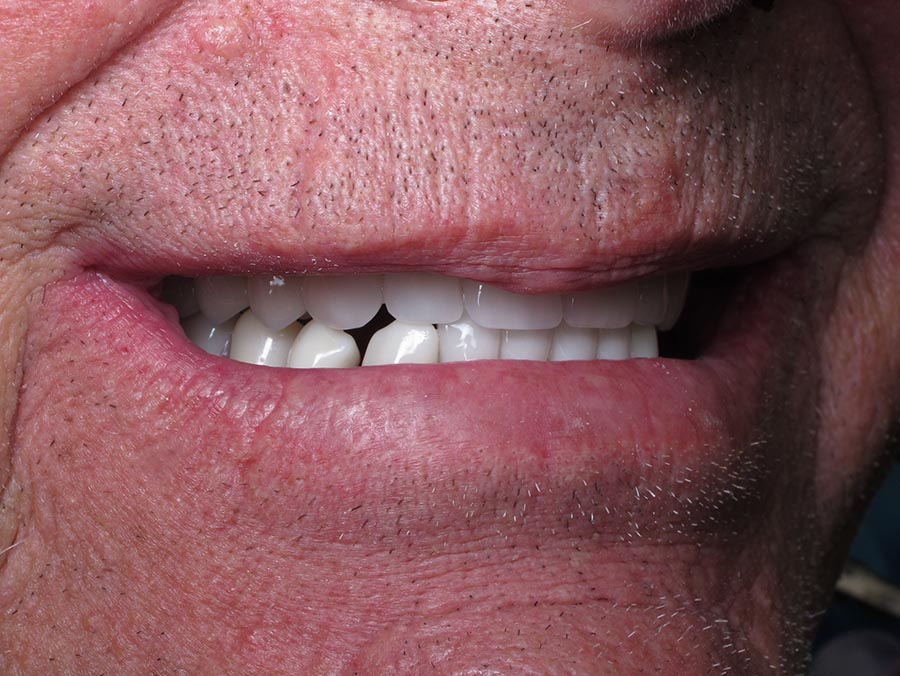
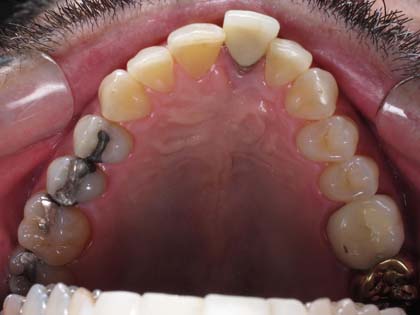
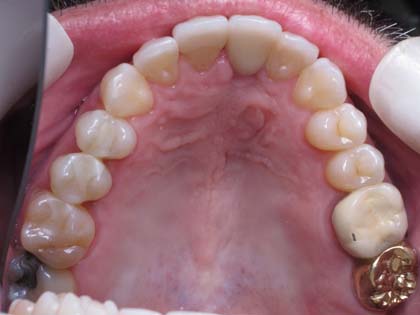
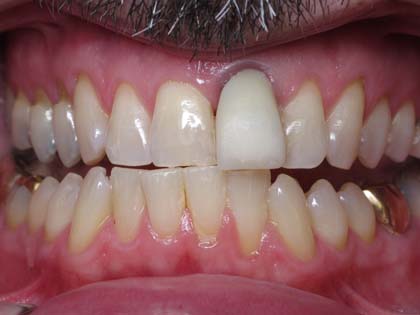
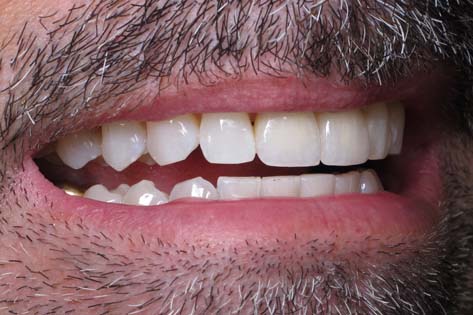
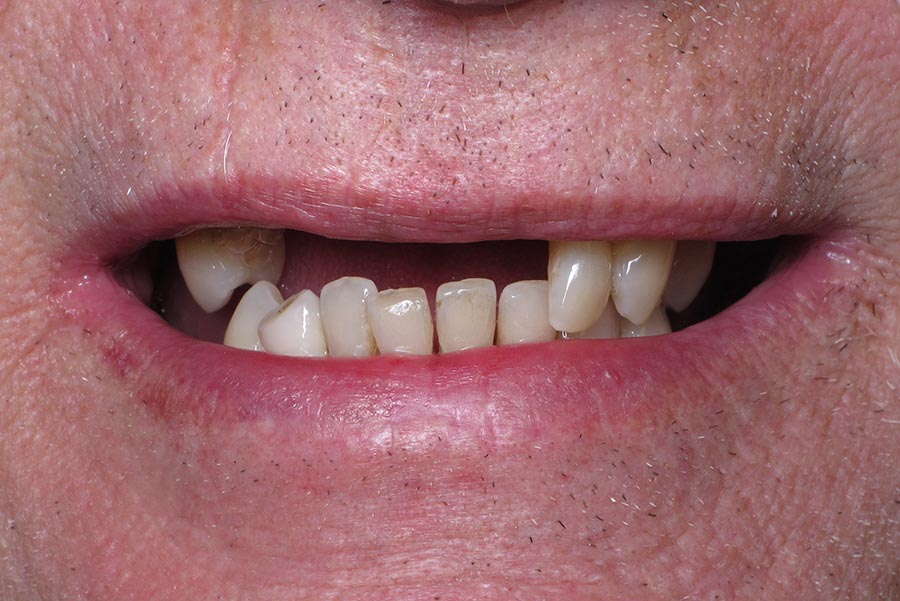
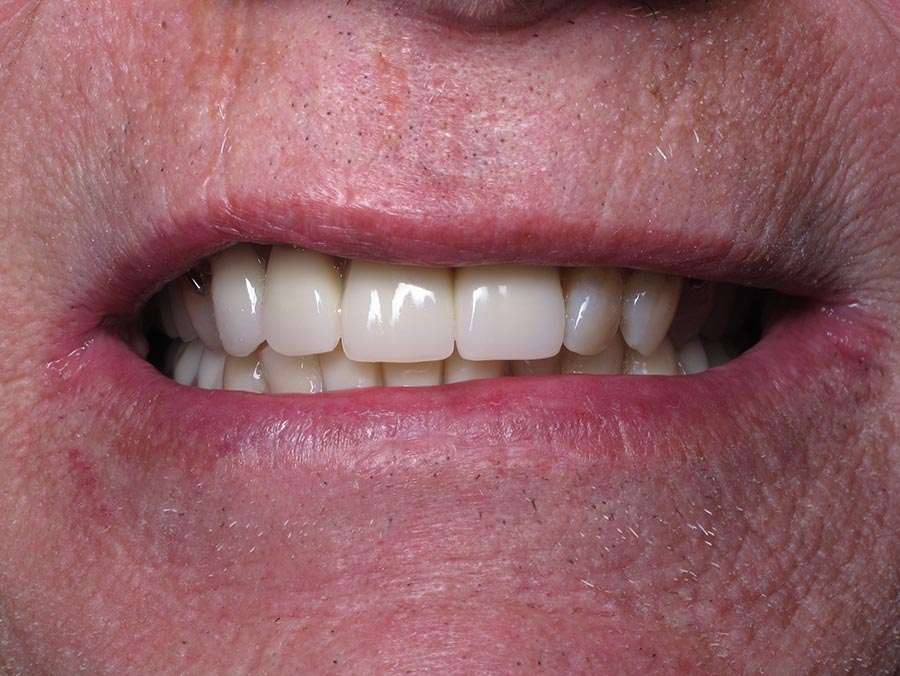
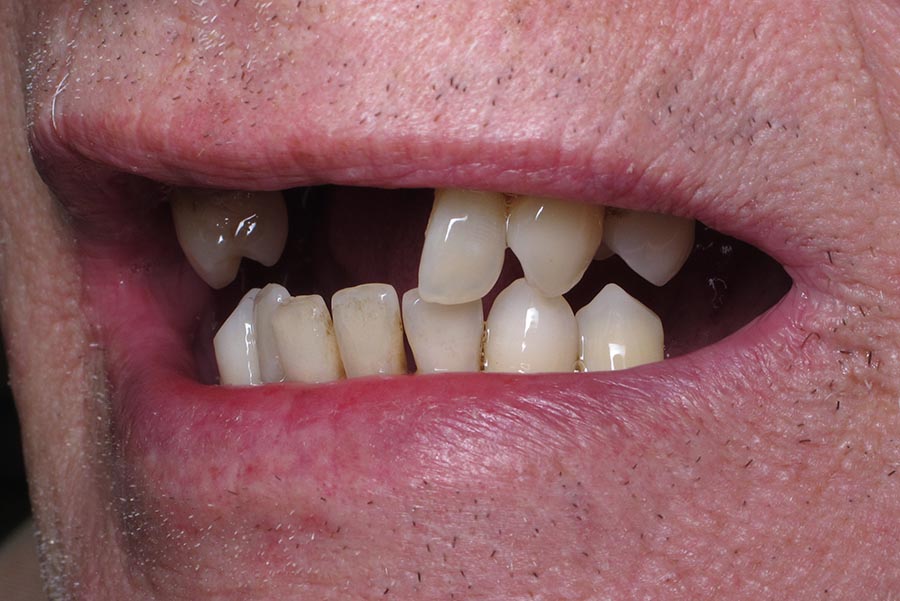
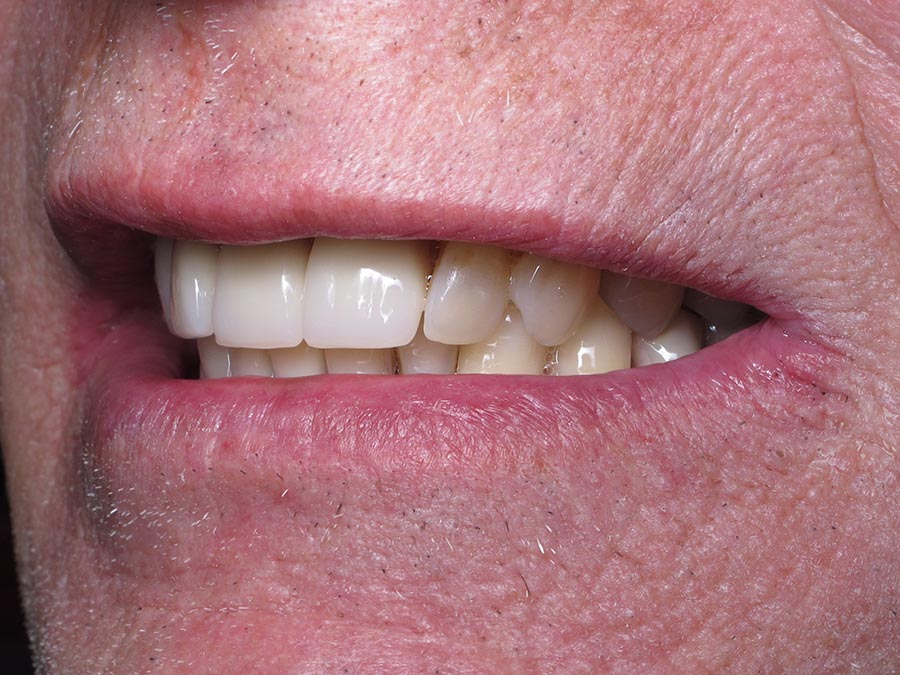
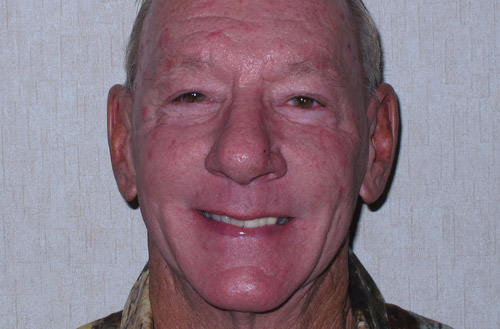
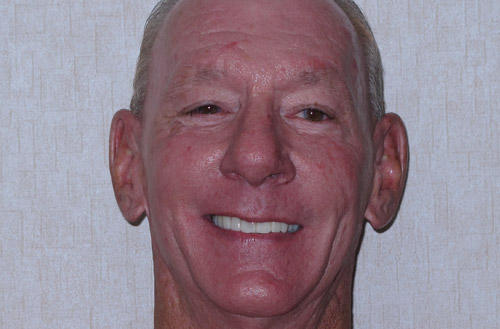
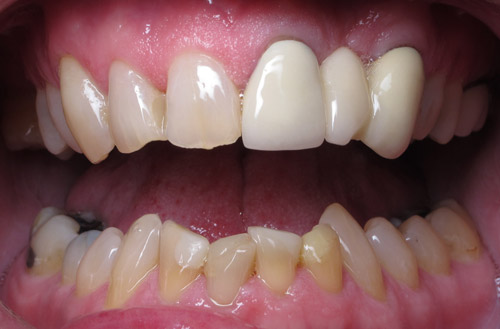
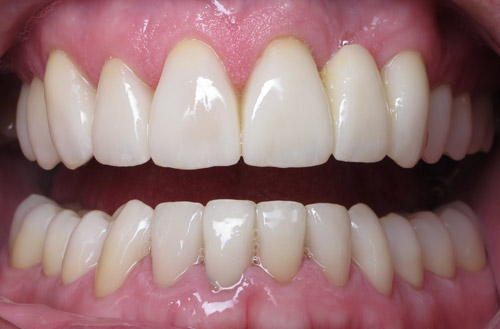
Cosmetic / Full-Mouth Restoration
The shape, color and function of the teeth are corrected.
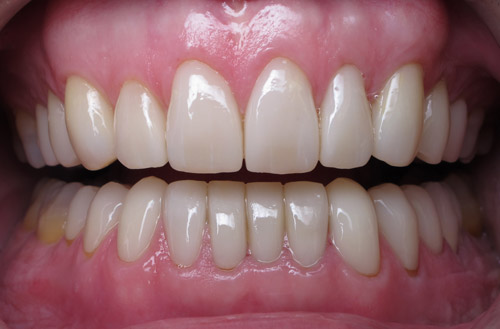
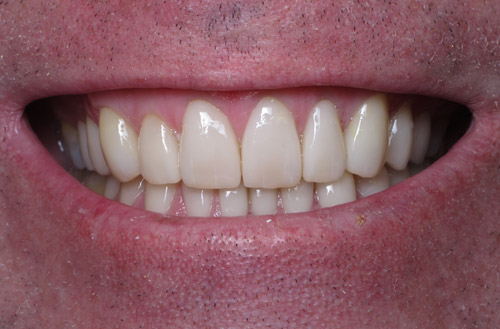
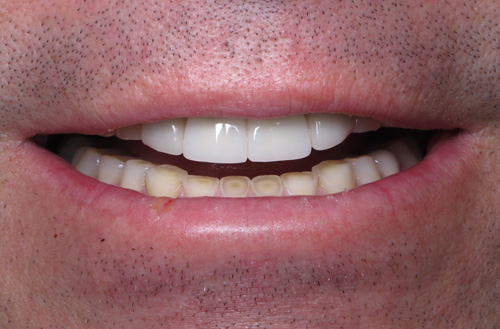
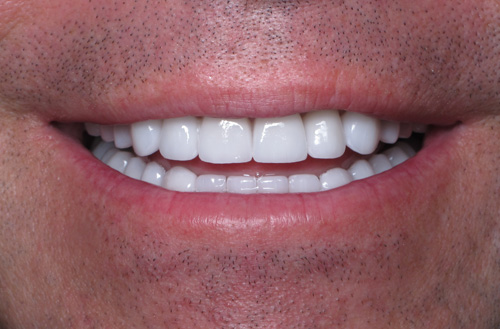
This gentleman had extreme wear on his teeth from abrasion and acid erosion. The visible portions of the smile were restored aesthetically with a combination of crowns and veneers. This resulted in a long-term solution to correct the shape, color and function of the teeth and was performed while he slept comfortably with IV anesthesia.
Case #2
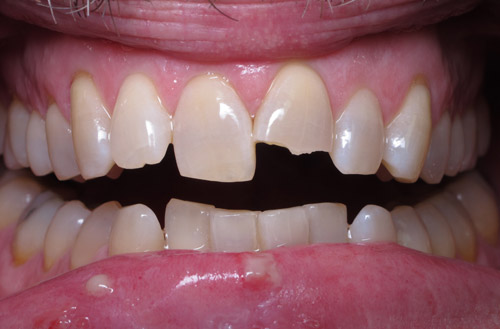
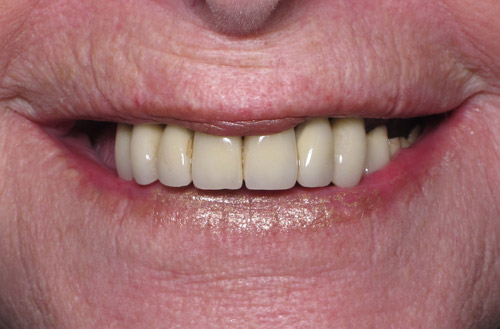
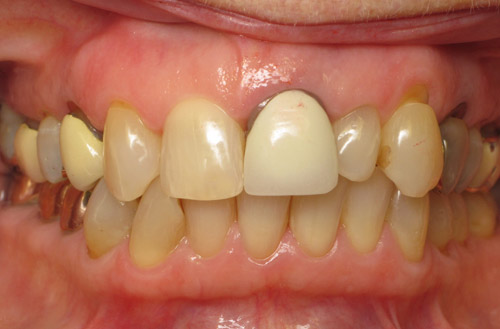
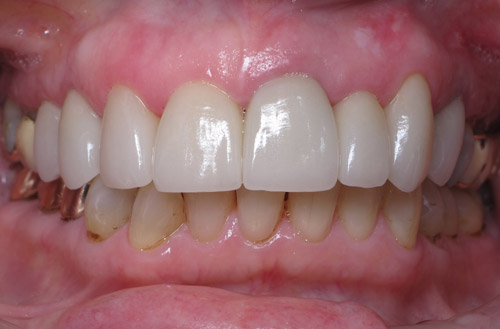
This gentleman had old crowns on his front teeth and is a severe grinder. He had worn his teeth down to nothing! They were all restored to add natural length back to his face and make his teeth permanently whiter.
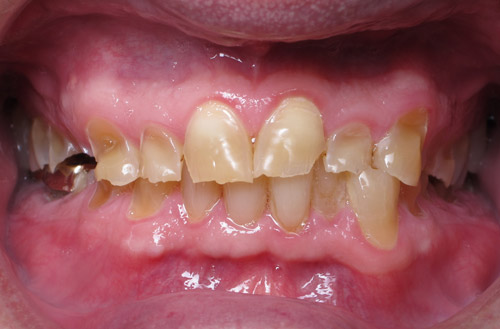
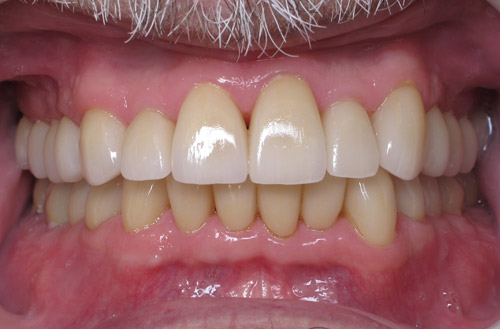
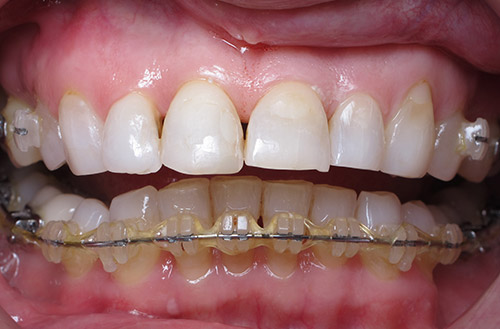
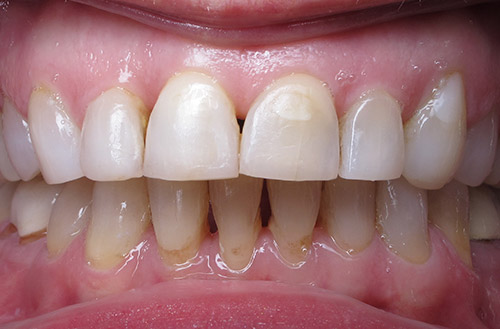
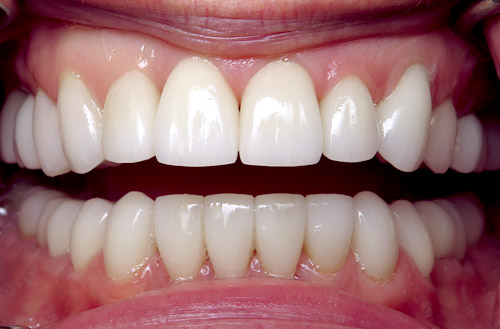
Case #3
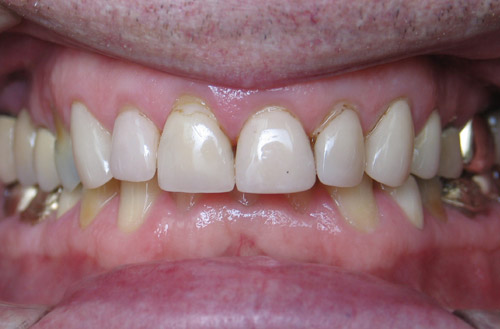
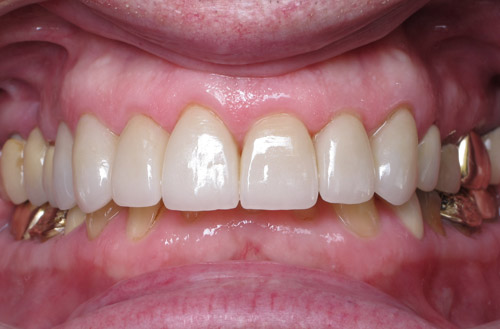
This gentleman routinely clenches his teeth and suffers from severe acid erosion. His teeth were becoming extremely sensitive from the lack of remaining tooth structure covering the nerves of his teeth. Our plan was to restore all of his teeth to their natural shape and appearance using individual crowns. Prior to beginning treatment, we worked with his primary care doctor to control the acid and an orthodontist to straighten his lower front teeth. After the alignment, we did a workup to design the new smile and proceeded with making the final crowns. We think the results are fantastic!
Case #4
Full mouth restored with dental implants and strong, new age dental ceramics.
Case #5
This lady had healthy teeth, but she did not have a good bite because her tooth alignment was significantly off. Dr. Paul Robinson (Robinson Orthodontics, Grapevine) straightened her teeth. Afterwards, she wanted to improve the aesthetics of her smile. We closed up the spaces between her teeth and revitalized their shape with new age dental ceramics.
Case #6
This lady had been suffering from poorly fit crowns and fillings with bacteria seeping up under them. She was terrified from previous dental experiences to have anything done. Her teeth were all saved and revitalized by removing all the decay and placing new crowns while she was sleeping under anesthesia provided by our Board Certified anesthesiologist.
Case #7
Smile restored with several implants where needed and crowns throughout.
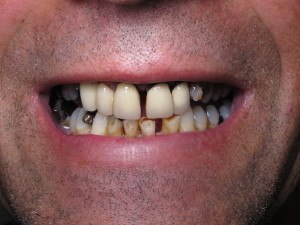
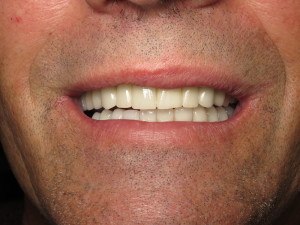
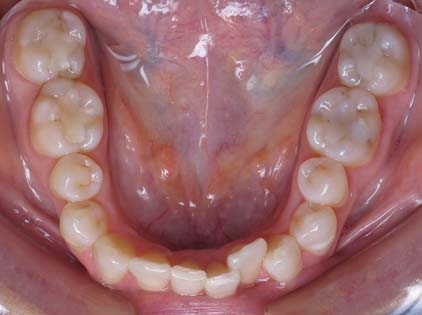
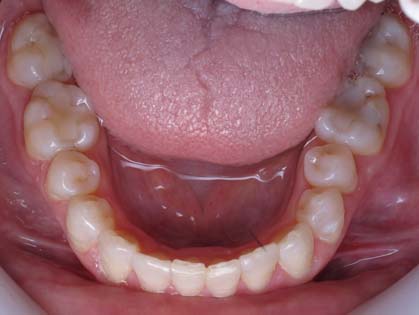
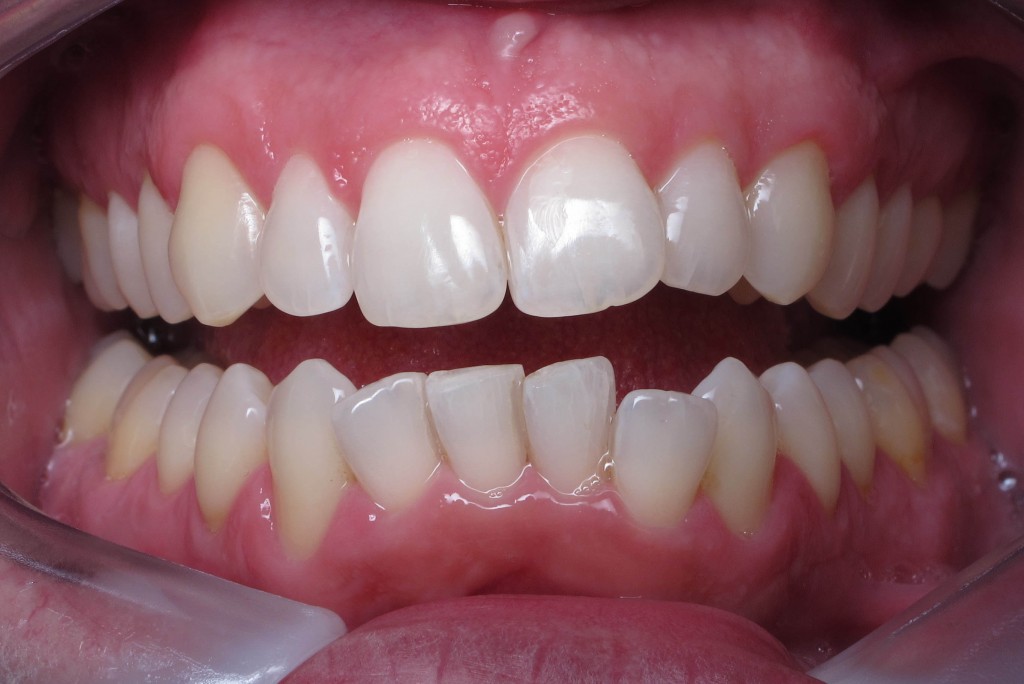
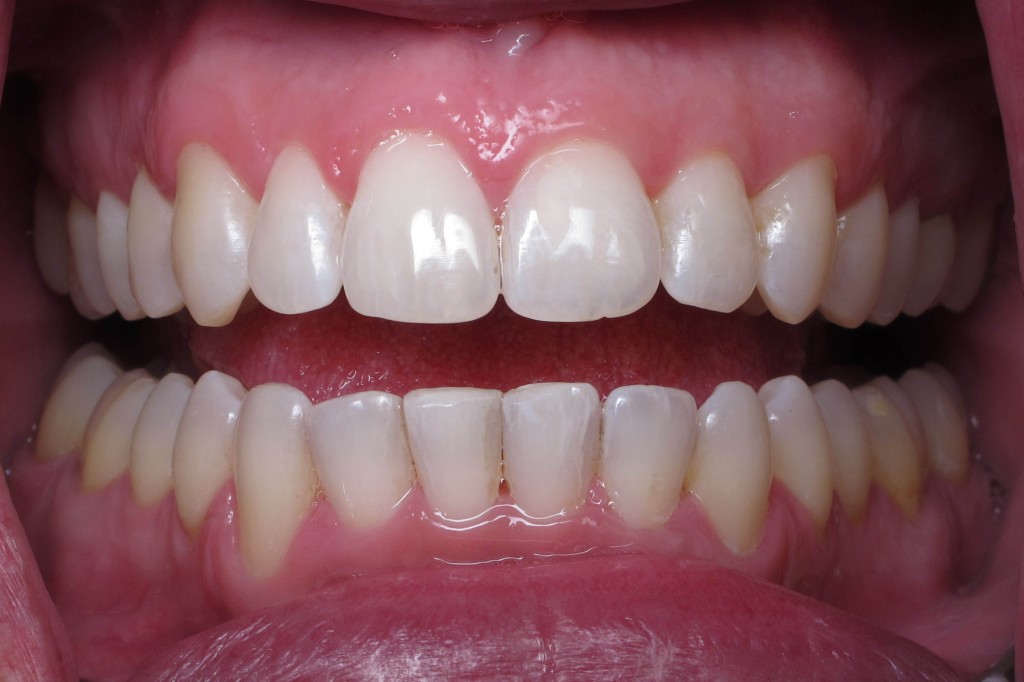
Grinding
Fractured front teeth due to severe grinding are restored.
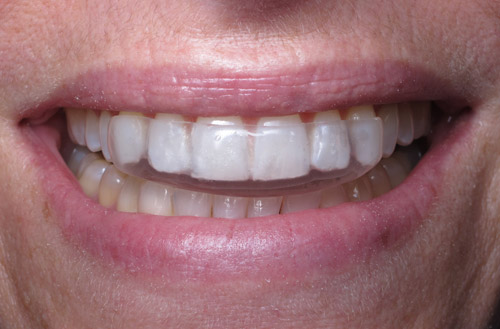
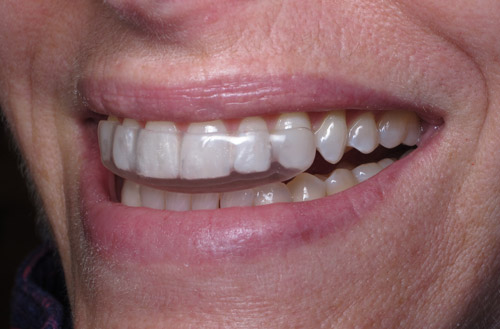
Night Guards to Prevent Teeth Grinding
Custom made appliances (night guards) are used to relieve stress in tender jaw joints (TMJ) and relieve facial, neck and upper back muscle pain. They are typically small, unobtrusive, durable and last for many years. Perhaps the best benefit is that they keep grinders and clenchers from wearing their teeth down.
Case #1
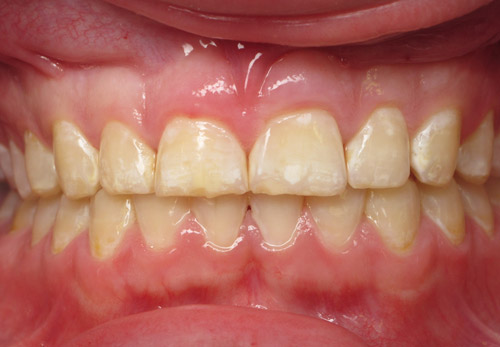
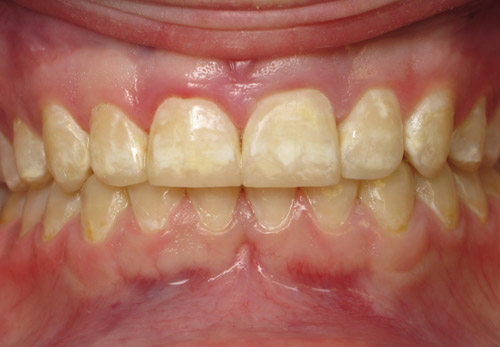
A case of grinding in a young 20-year-old patient. Because of the severe nighttime grinding, this patient’s smile was conservatively restored with composite restorations across the front teeth, and we placed in a night guard to prevent further damage to the natural teeth or the new restorations. The coloration is the patient’s natural shade and is not harmful; it can be corrected with bleaching.
Case #2
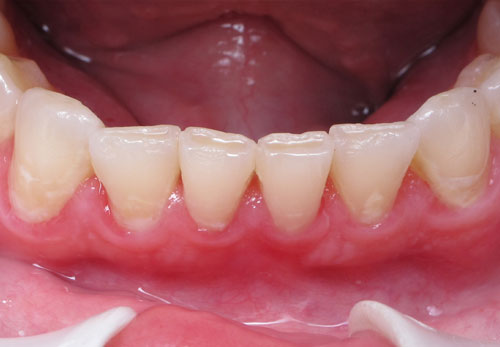
This patient noticed the wear on her lower front teeth worsening. It resulted from a combination of her grinding her teeth at night and a mixture of acid erosion. The teeth were conservatively bonded without changing the shape or color of her teeth, and the chance of future wear was significantly decreased.
Case #3
These are severely worn teeth from years of grinding. The facial height was restored (think dental facelift) with a full set of incredibly strong, new age ceramic crowns.
Restoring Old Restorations
This individual has had a tremendous amount of wear from grinding, as evident in the fracturing of the front tooth enamel. The older restorations are worn and starting to break down and become discolored. With conservative composites, the patient’s healthy smile is restored at minimal cost.
How Our Dental Restorations Are Made
Learn how we make and properly insert crowns and veneers.
The secret to longevity of ANY dental restoration is an exquisite fit and, of course, GOOD oral hygiene. But even someone with the very best toothbrush in the world, brushing 10 times a day, could not clean off the plaque around a crown that fits poorly.
Toothbrush bristles are simply too large to fit in the microscopic crevices created by crowns that do not fit well. A gap can occur between your tooth and the restoration if there is not absolute attention paid to this critical detail. Over time, bacteria will accumulate in such places, and new decay will spring up in the areas you cannot clean!
To ensure this does not happen for our patients, we use highly skilled ceramists who work under a microscope to perfect the fit of our restorations (crowns, veneers, etc.)! Many offices will advertise a quick fix (such as getting your crown in one appointment!), but in our experience, the time it takes to handcraft a precision restoration for your tooth far outweighs something that may need to be redone in the near future.
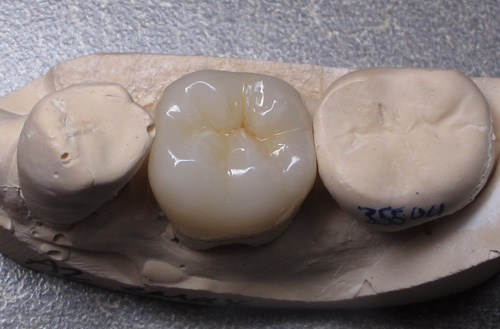
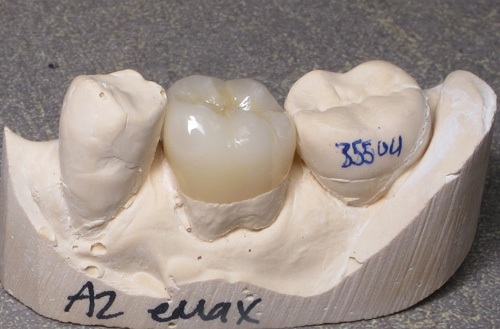
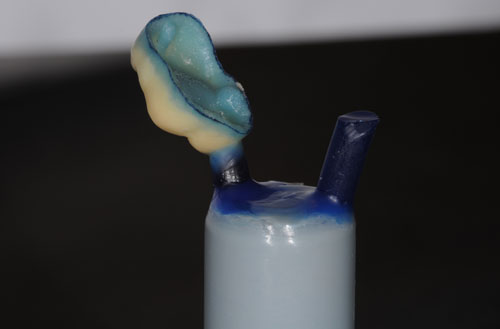
Handcrafted by Ceramic Experts
1. Tooth is hand made in wax on an accurate model.
2. Blue wax is used under a microscope to perfect the seal.
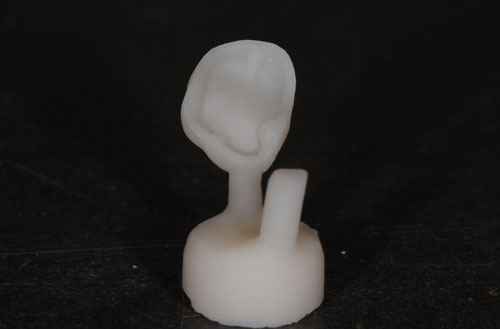
3. The waxed tooth is then pressed with super-strong, new age lithium disilicate ceramics.
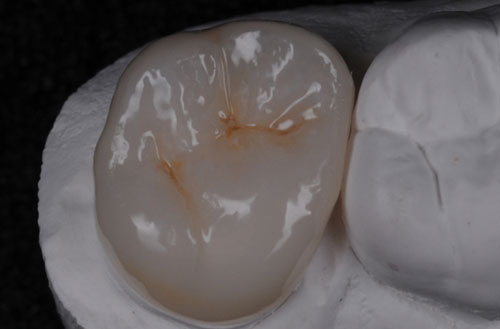
4. The crown is removed from the porcelain block and finished to match the patient’s teeth. Color can be added to the tooth externally and glazed or cut back and internally layered with colored ceramics.
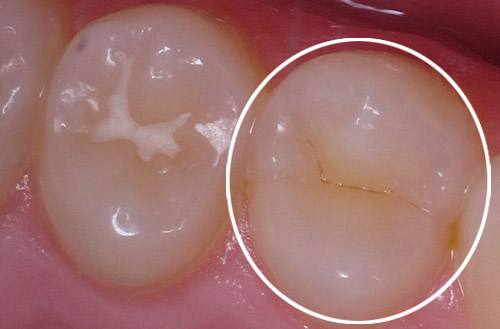
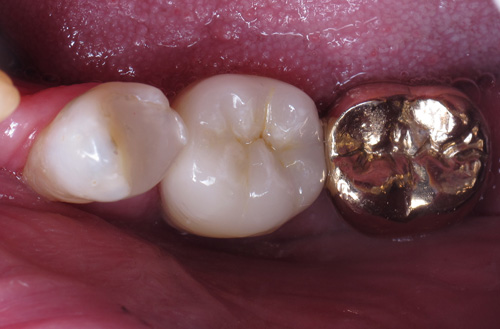
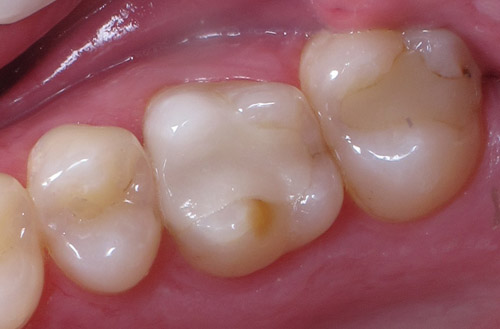
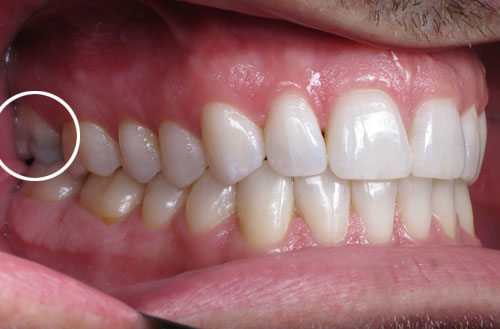
Case #1
(Same crown as shown above but in the patient’s mouth.)
This gentleman had a hairline fracture down the side of his upper left back tooth causing him a great deal of discomfort when he bit down on anything. Much like a broken bone needs to be stabilized with a cast, dentists use crowns to stabilize broken teeth. Because the crown fit so well, the pain was resolved without the need for any other treatment! Read on to see why our crowns have such a precise fit!
Case #2
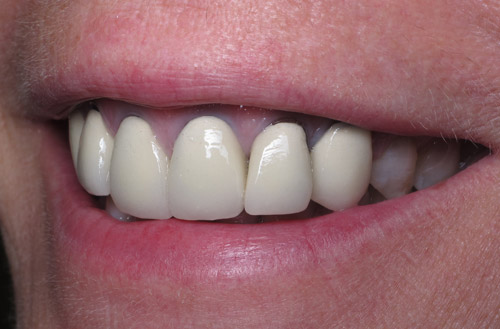
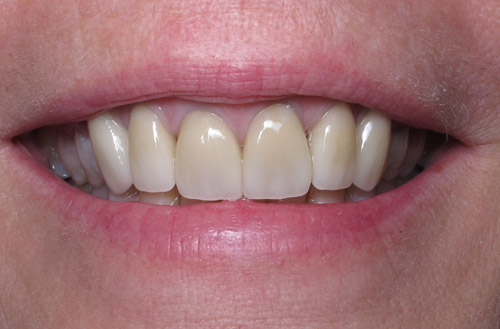
Old Restorations (Front View)
Old Restorations (Side View)
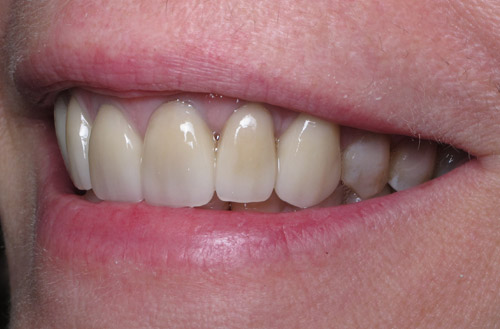
Final Restorations (Front View)
Final Restorations (Side View)
Traditionally when a crown or a veneer is needed, a dentist will prepare a tooth, have a restoration made and then insert it. However, typically no consideration is given to how much tooth really needs to be removed, and the patient has no idea what the final product will look like prior to undertaking the procedure. Also, there is a tremendous difference in the quality of the laboratory the dentist chooses to use to make their restorations.
We believe the best restorations require proper planning, an excellent ceramist and approval by the patient prior to beginning. Here is an example of how six failing restorations were replaced by new all ceramic crowns. The process involved taking impressions used to develop the new teeth in wax. This serves as a blueprint to check the aesthetics of the final result before starting and to verify that the new crowns will work properly with the lower teeth. Once approved, the old dental work is removed and the teeth are modified just enough to allow room for the new restorations to fit. This ensures maximum retention of vital tooth structure and helps to keep the teeth healthy. Afterwards, the lab’s highly-trained ceramists create the new crowns that take into consideration the patient’s desires for tooth length, position and color. The final restorations are inserted, and we are left with a very satisfied patient!
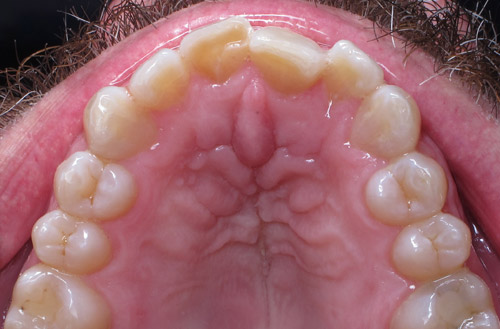
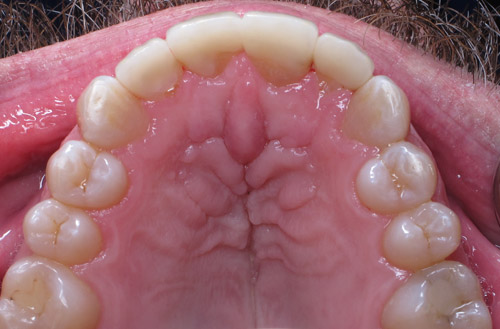
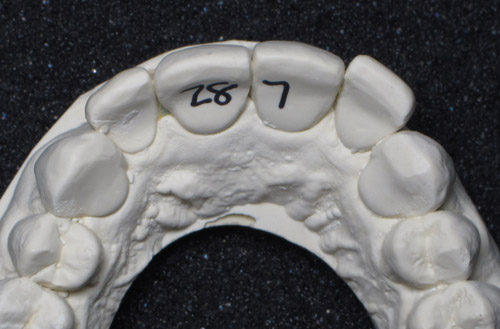
Model of Original Teeth (Top View)
Model of Original Teeth (Front View)
Diagnostic Model (Top View)
Diagnostic Model (Front View)
Final Restorations (Top View)
Case #3
Upper front four teeth and one lower front tooth restored with ceramics.
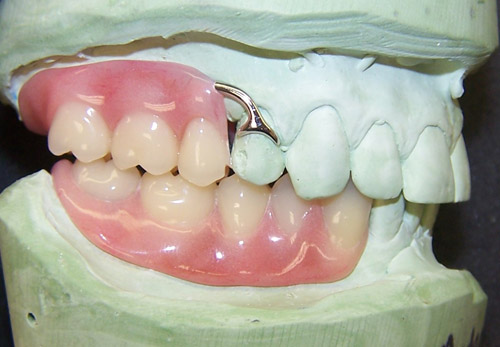
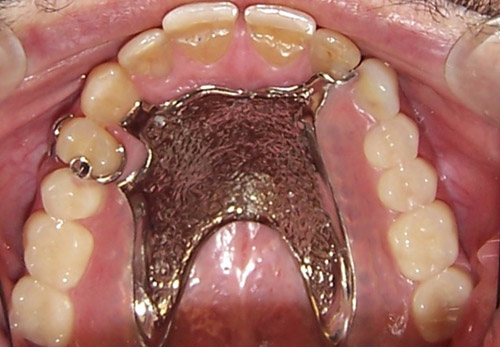
Implant-Retained Partials
We created a brand-new smile for this gentleman using the above procedures.
Case #1
This gentleman flew in from Colorado for his treatment. He started off with broken and missing teeth. His front teeth had old, failing root canals, and the teeth had broken. We performed the root canals again and bleached his teeth. Then, the teeth were built back up with composites to determine where everything should go. He wanted to find a relatively inexpensive solution to replace his missing teeth, so we opted to place implants in his upper and lower jaws and restore them with partial dentures that lock into place.
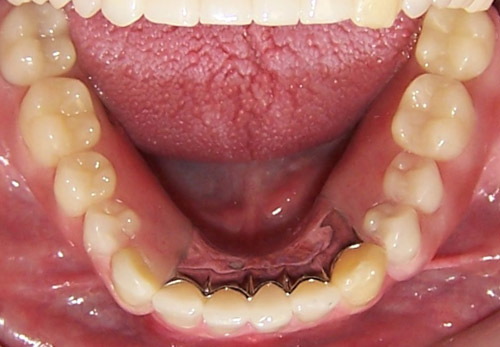
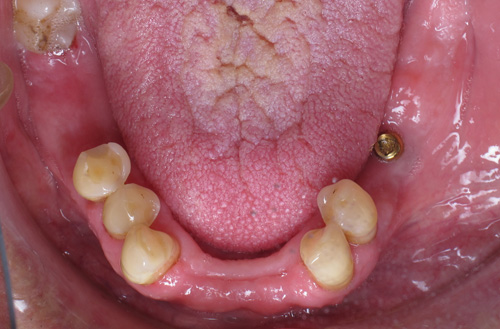
Case #2
This gentleman lost a number of teeth in his lower jaw. His upper teeth are an old existing denture. Using his existing teeth and an implant to support a prosthesis, his lower teeth were restored to full function.
Case #3
Invisalign®
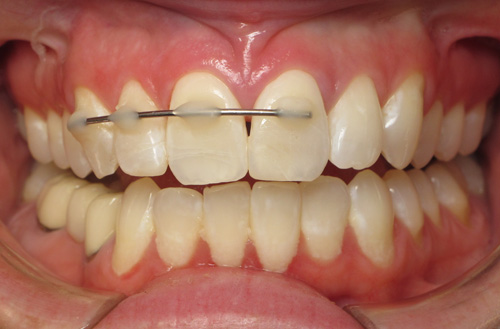
Invisalign clear aligners were used to close upper spaces and realign lower front teeth.
Case #1
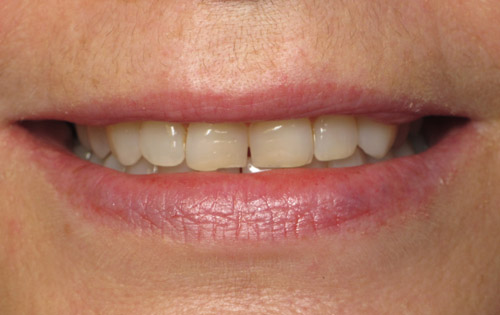
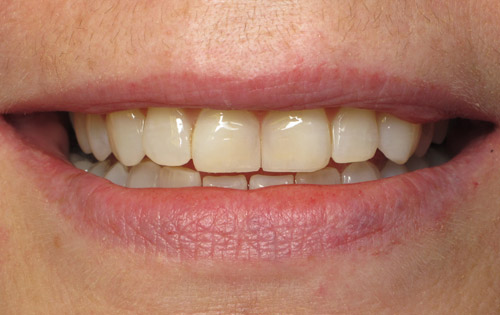
Invisalign aligners were used to close upper spaces and realign lower front teeth.
Case #2
Invisalign aligners were used to align upper front teeth and create a better bite.
Case #3
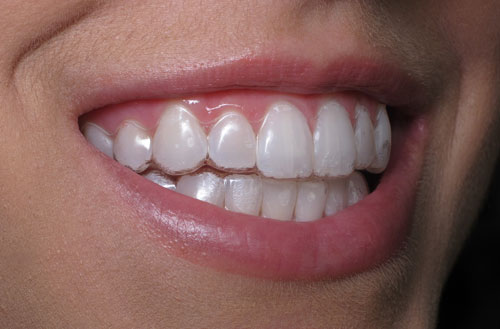
How noticeable are Invisalign aligners? This lady says, “People never notice them!” Here, you can see what upper and lower Invisalign trays look like close up. Also, as an added bonus she is able to bleach her teeth while they are being straightened by using the aligners as bleaching trays!
Invisalign and the Invisalign logo, among others, are trademarks of Align Technology, Inc., and are registered in the U.S. and other countries.
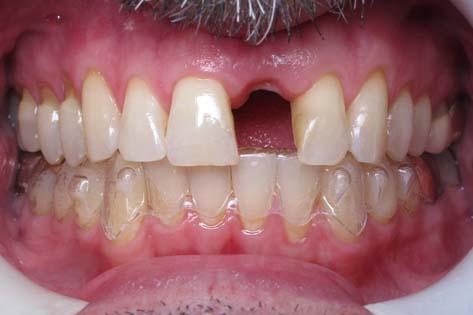
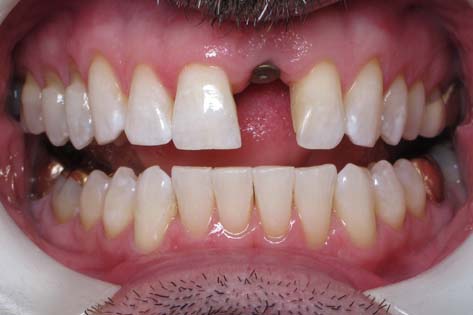
Invisalign®, Implants & Crowns
A wonderful example of what can be done with a combination of orthodontics, restorative dentistry and implantology.
Left — Bone healed on upper front tooth, lower Invisalign tray visible.
Right — Invisalign treatment complete, KöR® Whitening done, implant placed and fully healed.
This gentleman had a front tooth with a failing root canal, and the bone around the root was deteriorating. A decision was made to remove the tooth and graft back the missing bone. While this took place, he completed Invisalign treatment to put all his teeth in the right locations. After bone healing, an implant was placed to replace the missing tooth root, and the two front teeth received crowns so they would be a perfect match in shape and color. This is a wonderful example of what can be done with a combination of orthodontics, restorative dentistry and implantology.
Invisalign and the Invisalign logo, among others, are trademarks of Align Technology, Inc., and are registered in the U.S. and other countries.
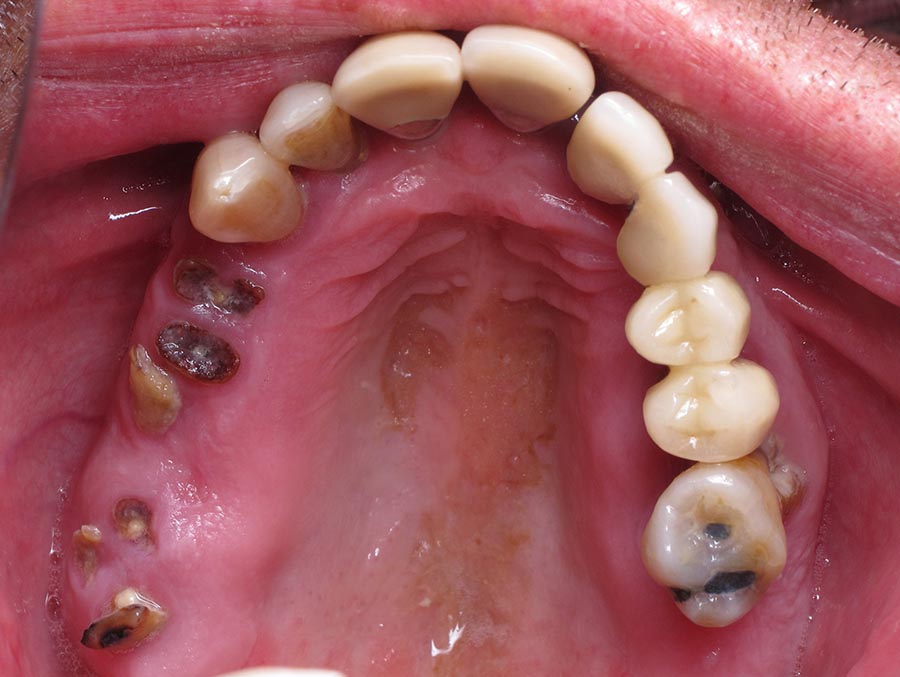
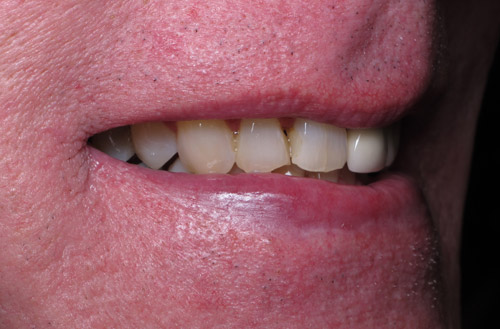
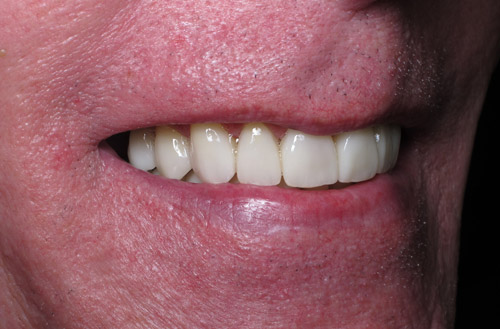
Large Leaking Old Fillings
Crowns are a good alternative to removing decay and old restorations.
The structure of this patient’s teeth was quite damaged. If we had decided to remove the decay that was present as well as the old restorations, the remaining tooth structure would be very weak. We opted to go with crowns instead.
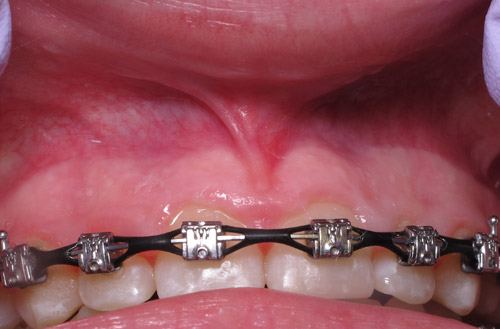
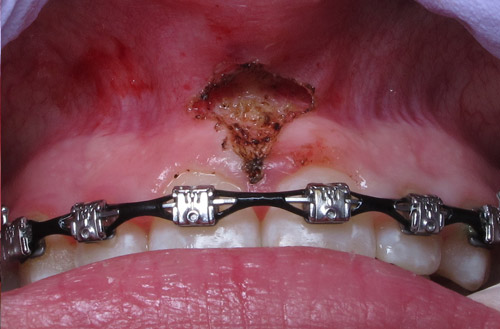
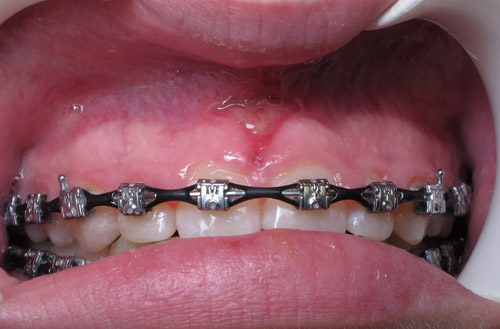
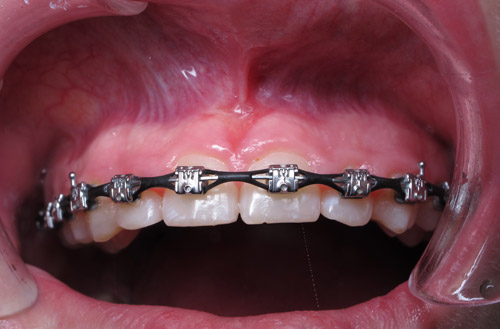
Laser Procedures
Removal of the tissue that attaches the upper lip to the gums.
A frenectomy is often performed to remove fibrous tissues between teeth that can cause teeth to shift or pull tissue away from root surfaces. In this case, it was necessary to prevent the teeth from moving after orthodontics.
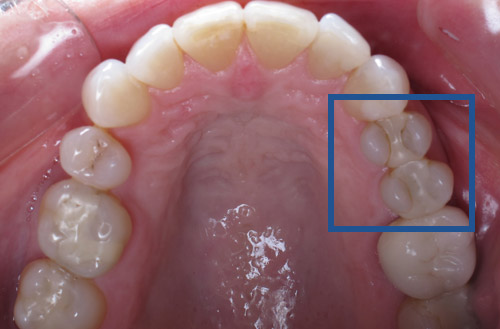
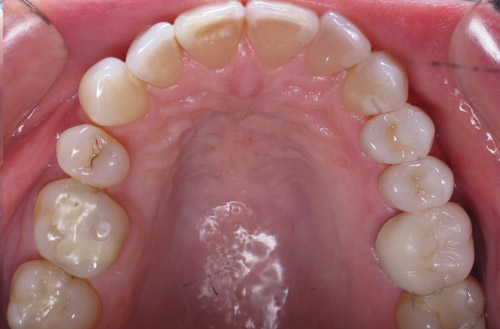
Onlays
A broken molar is easily repaired with an all-ceramic onlay.
Case #1
This individual is in mid-treatment to correct several things. Her big concern is food constantly getting impacted in the space between her two teeth, which is responsible for causing decay. The old fillings were removed and the space was conservatively corrected using bonded ceramic restorations (onlays).
Case #2
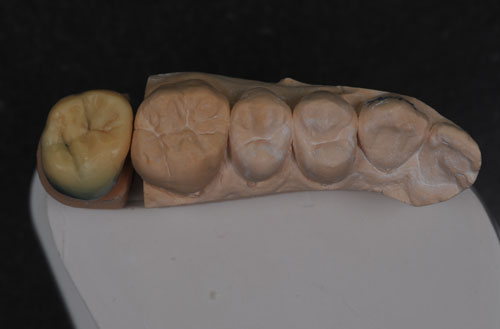
This gentleman broke his lower first molar. It was easily repaired using an all-ceramic onlay that not only looks great but will function well for many years to come.
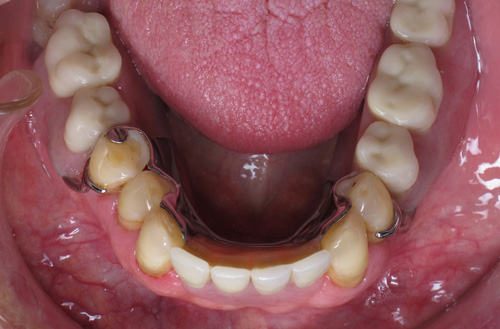
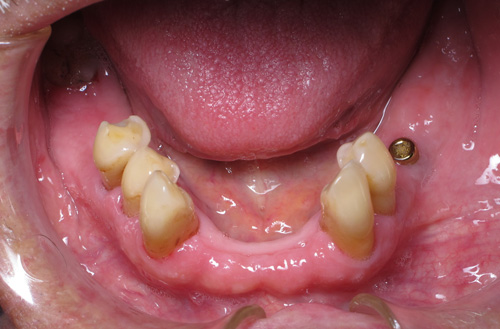
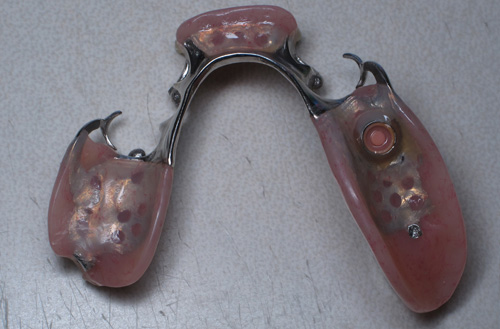
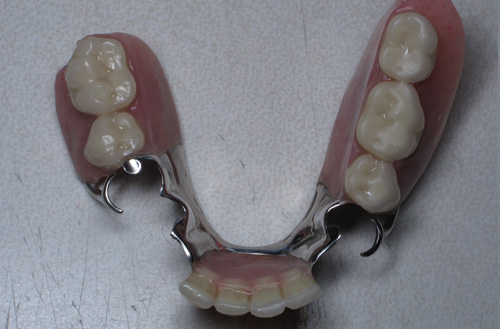
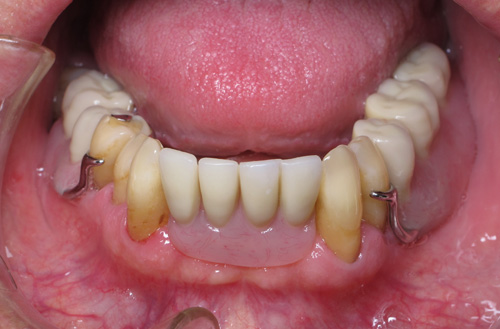
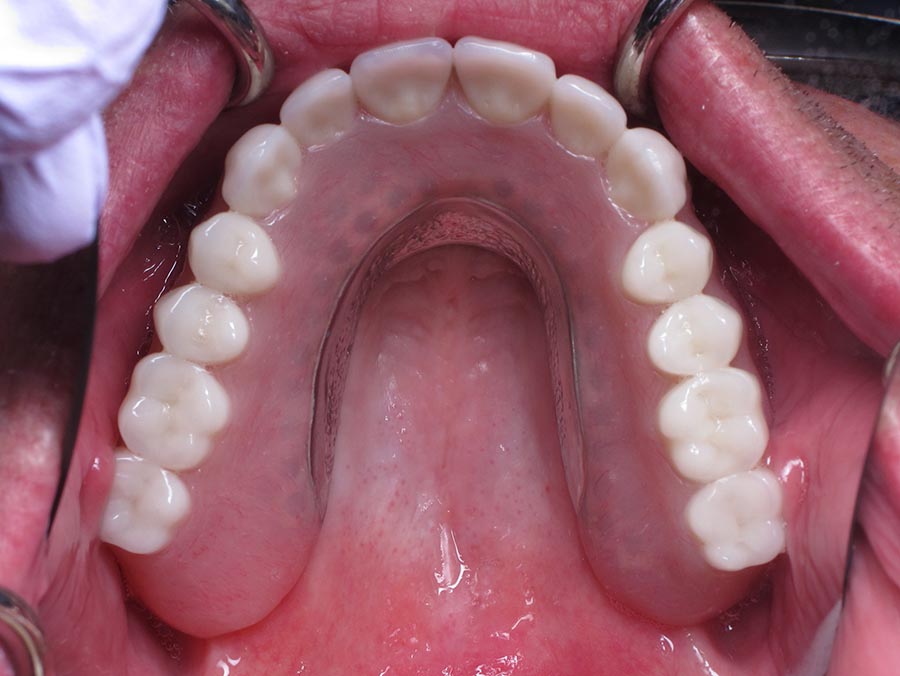
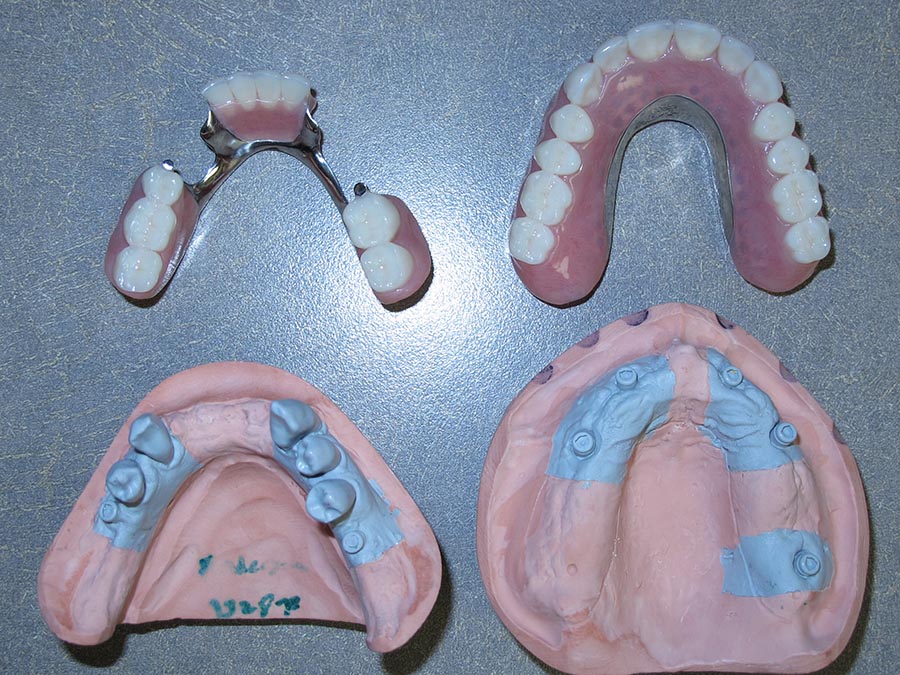
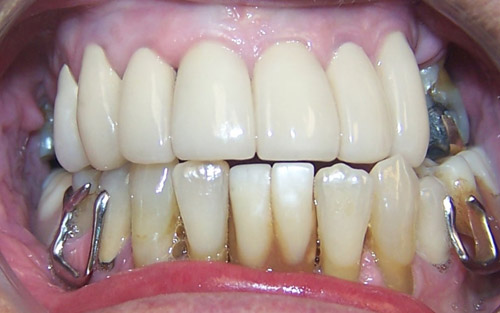
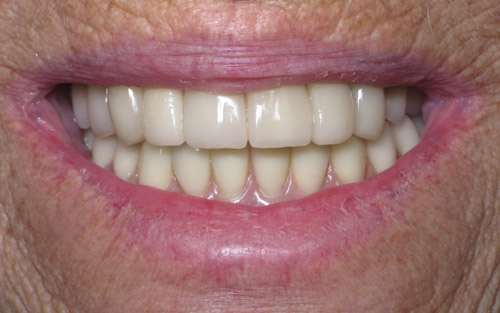
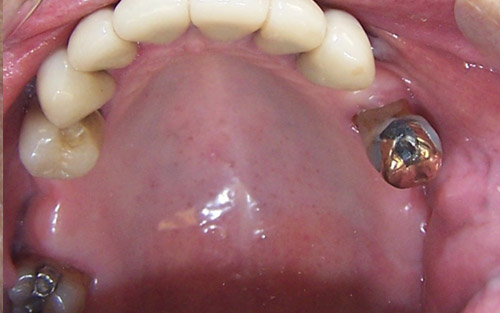
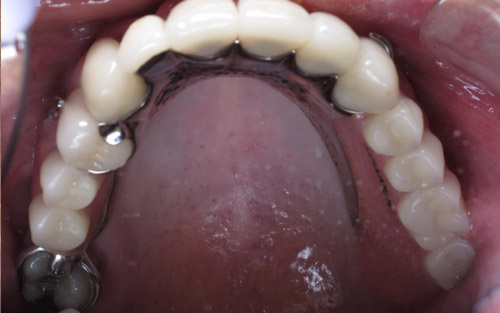
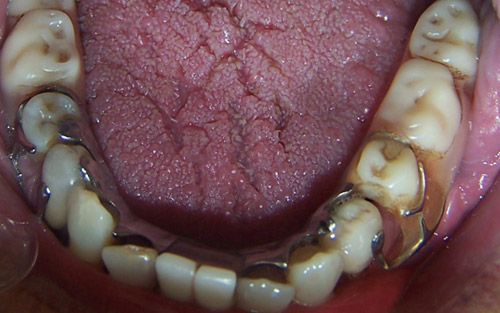
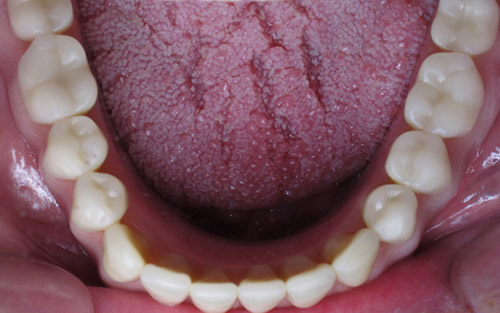
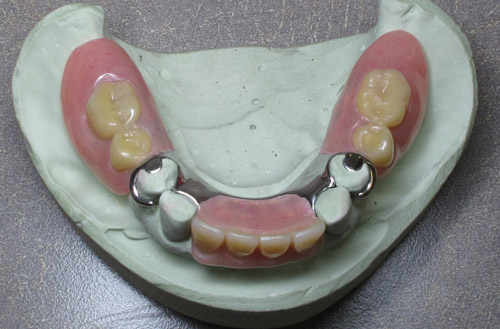
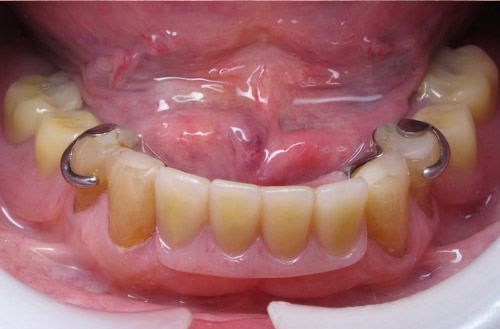
Partial & Complete Dentures
Broken teeth are replaced quickly and inexpensively with a prosthesis.
Case #1
Some patients are already missing a lot of teeth and need a solution to replace those teeth inexpensively. If enough healthy teeth are still present to support a well-made partial denture, then a smile can be restored at a relatively low cost. With this particular case, the individual’s lower teeth were all failing and had to be replaced with a denture. Two implants were used to support that denture and can somewhat be seen in one of the photographs. The emphasis is on the upper partial. The patient really cared about her upper teeth and tried hard to keep them, but because of a dry mouth condition and difficulty in keeping up with maintenance, she managed to lose a significant number of teeth. We restored the upper with a partial denture.
Case #2
This gentleman had broken off a front tooth and had several in the back of his mouth crumble from decay. He was very pleased to receive a prosthesis quickly and easily at a low cost that allowed him to eat comfortably again.
Case #3
Restoring Decay
Decaying front teeth are restored with composites.
This patient had cavities in her front teeth due to a great deal of soda drinking and poor oral hygiene. By removing the decay, conservatively building the teeth back with composites and teaching her to improve her home hygiene care, she now has restored front teeth at a minor cost.
Restoring Old Work
Old restorations are removed and restored using crowns and veneers.
Case #1
This individual had a lot of work done 15 to 20 years ago and had not been maintaining it because of various life circumstances. Veneers are typically the recommended option for front teeth, but that was not a possibility for this patient because her teeth already had crowns on them. So we replaced her crowns and restored one of her back teeth with an onlay.
Case #2
Many individuals have dental work done over their lifetime and ultimately end up with a patchwork mix and match of teeth that do not look like teeth at all. That is the case with this patient. She is also missing a front tooth (the small tooth on the right side of her two front teeth does not exist on the left). To correct this, we came up with a game plan that would not only make her teeth look new and healthy but also create the illusion of adding in the missing tooth. Her smile is restored with a combination of veneers and crowns to replace her misaligned, damaged and misshapen teeth.
Case #3
Here is another situation where old dentistry needed to be replaced, starting with the upper anterior teeth. Old restorations were removed and restored using new crowns and veneers as necessary. This gentleman now has beautiful restorations that look like healthy natural teeth as a result.
Restoring Patchwork Dentistry
Old dental work is replaced while our patient rests comfortably.
Case #1
Here is one of our favorite patients. He had old dental work that needed to be replaced, and his bite needed to be corrected. He also chose to brighten his whole smile in the process. The result turned out fantastic, and the best part of the case is the whole thing was completed while he slept comfortably with IV anesthesia!
Case #2
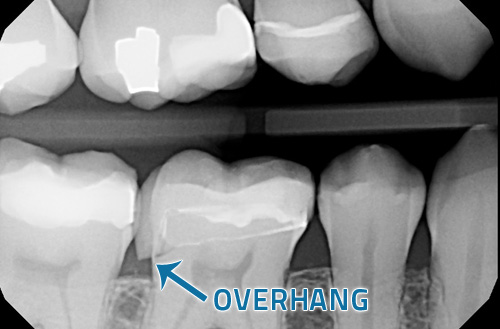
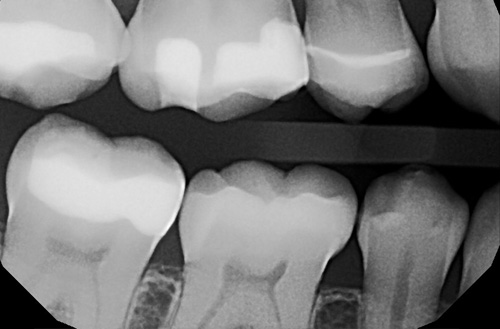
Have you ever had a dental restoration placed that did not feel right? This person had a crown placed that made it very difficult to floss. We commonly replace restorations to create proper shape and contour to teeth so the teeth function properly, do not hurt and can be easily cleaned.
Sealants
Thin coatings are applied to the teeth to protect them from decay.
A dental sealant is a thin, plastic coating that is usually painted on the chewing surfaces of the back teeth (molars) to prevent tooth decay in deep tooth grooves.
Sealants are applied in a dentist’s office. They can only be seen if looking very close at a tooth and typically last from 5 to 10 years. Sealants are generally only applied to children’s teeth since they are more susceptible to tooth decay. Sealants should be checked at your regular dental appointment and can be reapplied if they are no longer in place.
At Anderson Dentistry, applying a sealant is quick and easy … no drilling or removal of tooth structure is required. Sealants save you time and money by preventing dental decay from affecting your children. They are one more way to ensure a healthy smile!
Sport Guards
Restoring damaged teeth from sports related injuries.
Case #1
Please have your children wear an athletic mouth guard while playing sports. Teeth can easily be damaged at play. Individuals with braces may purchase mouth guards from a sports store, and those without braces would benefit from a custom fitting mouth guard, made in our office for $25. Protect your child’s teeth!
Case #2
Adults can benefit from a sports guard, too! If you play contact sports or clench your teeth while active, consider having a custom guard made. This inexpensive, preventive service can save a great deal of pain and expense!
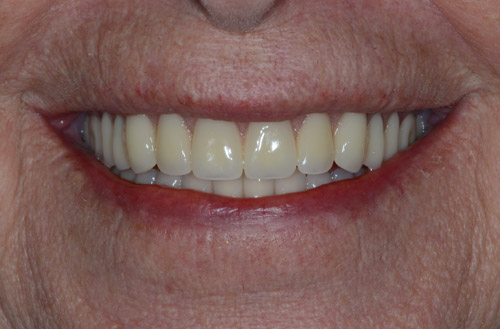
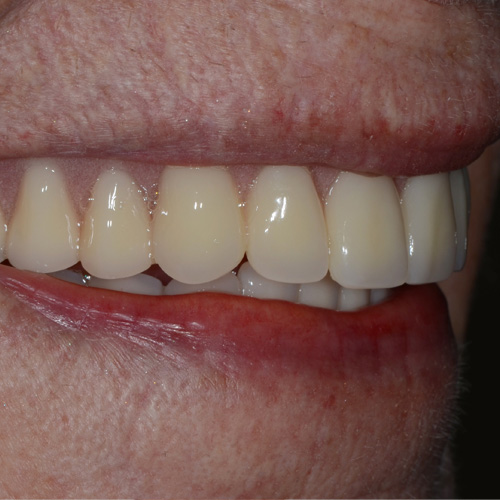
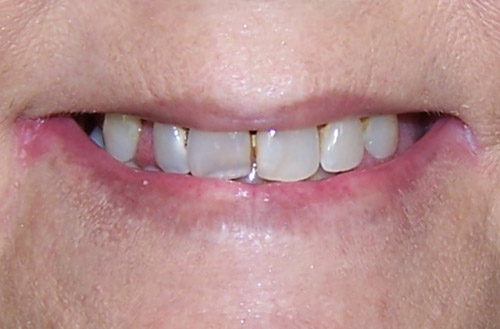
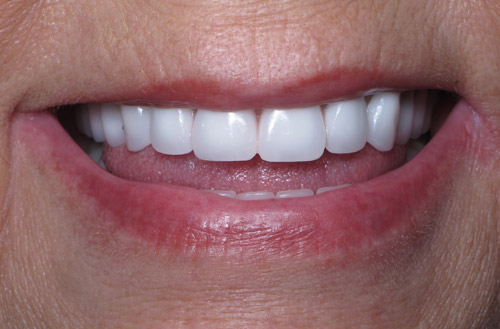
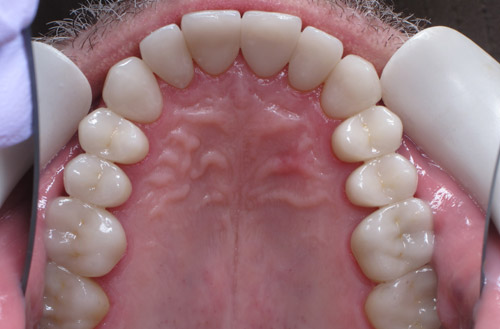
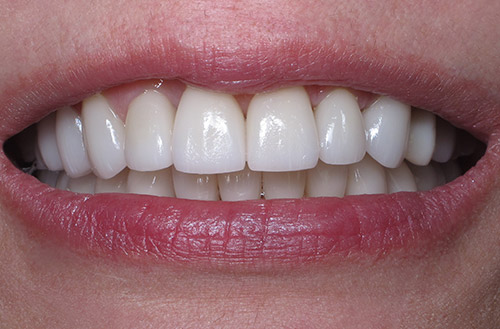
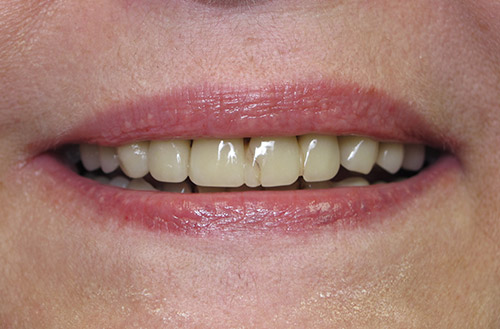
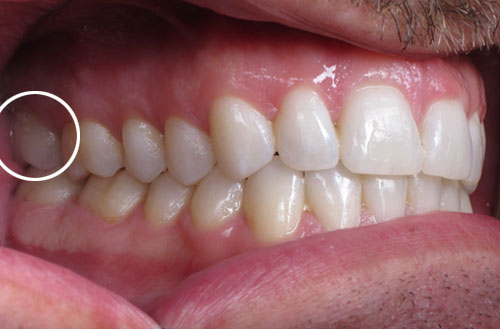
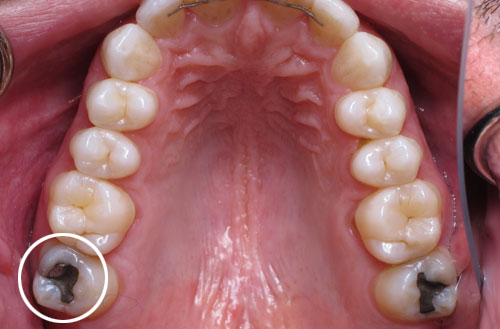
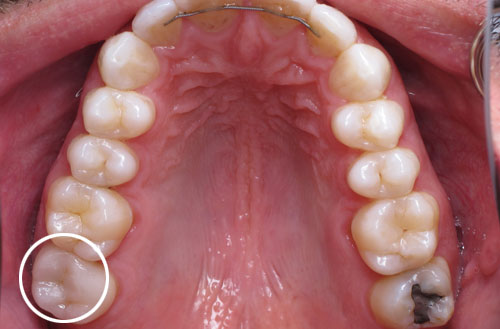
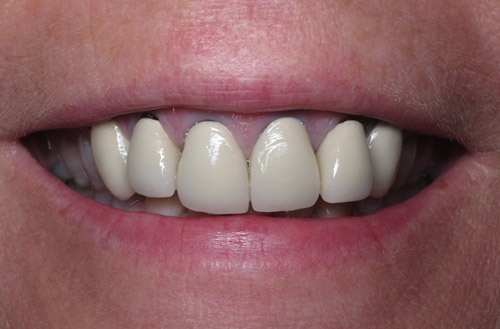
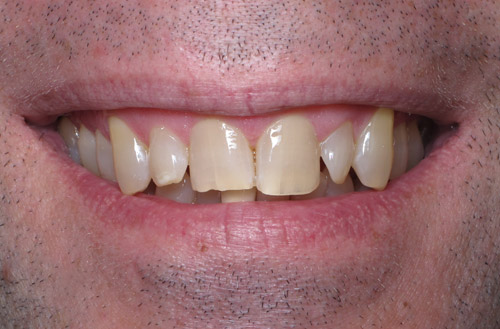
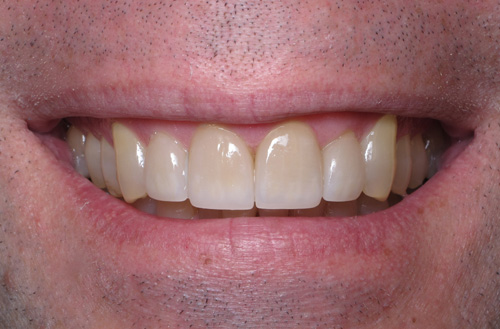
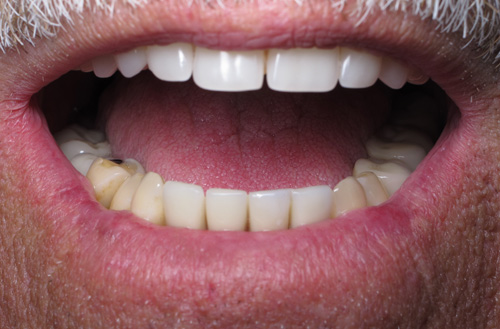
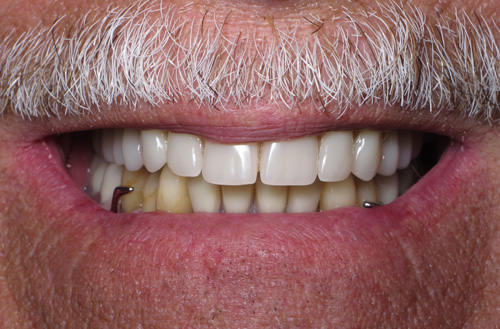
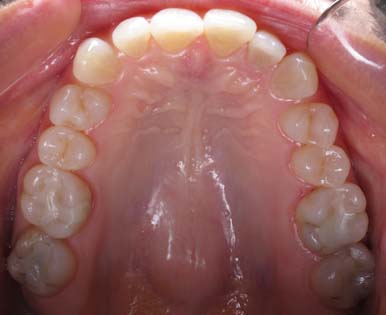
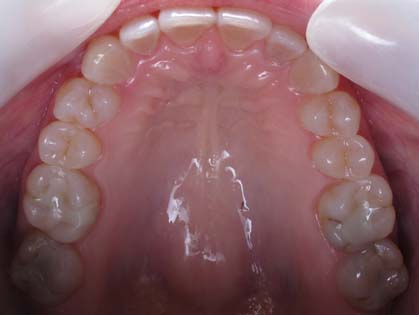
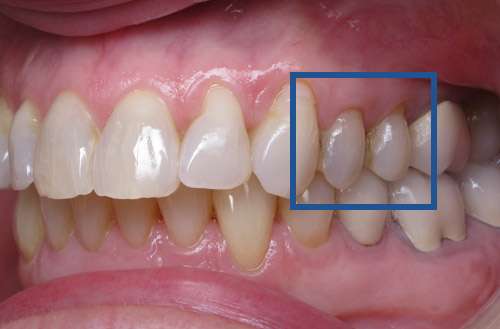
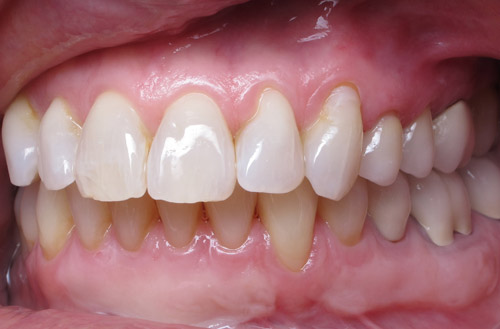
Upper Teeth Restorations
Worn upper teeth are fixed with natural looking restorations.
Case #1
Case #2
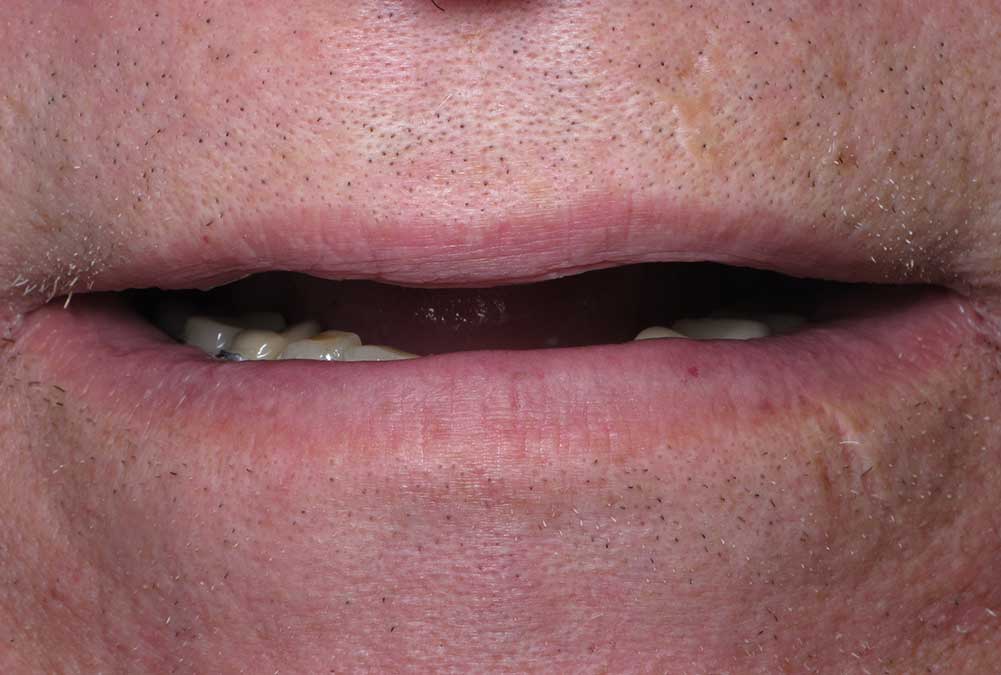
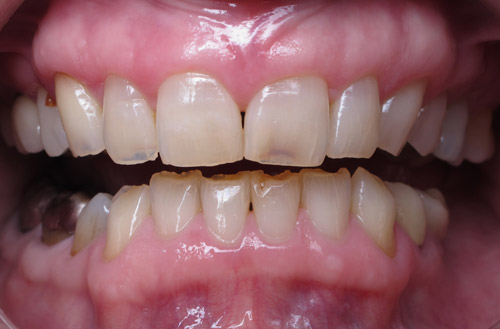
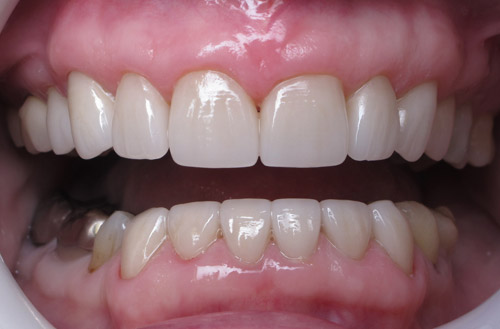
This patient noticed wear on her teeth, which was in turn making her mouth look collapsed. We restored her smile by placing restorations on all of her upper teeth. The new teeth are the color, shape and length she loves.
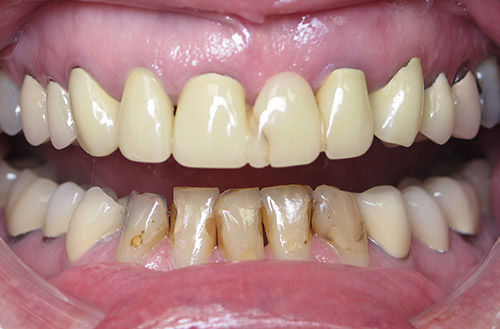
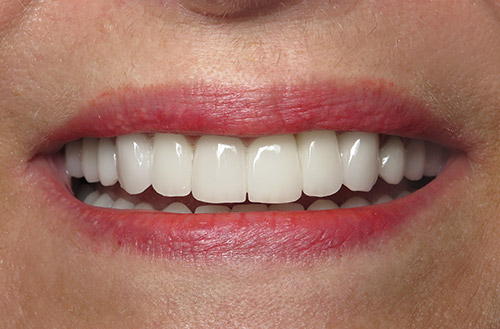
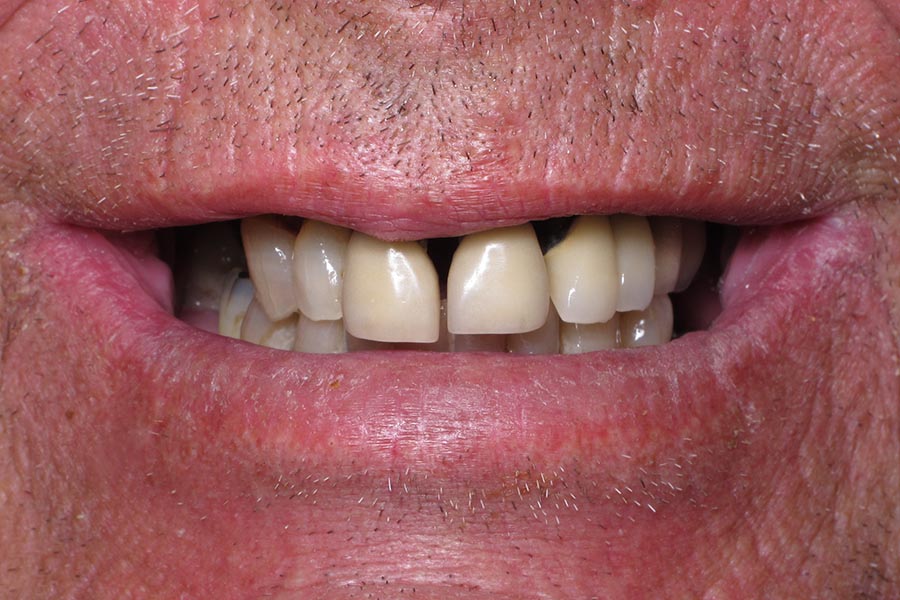
Case #3
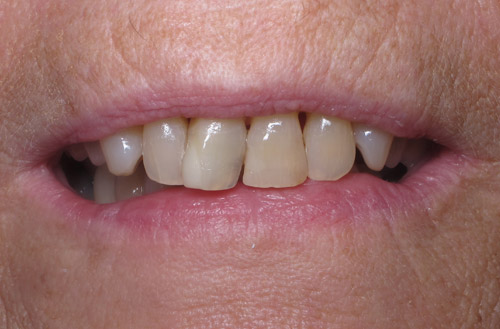
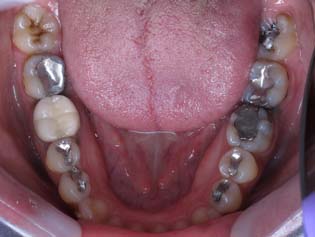
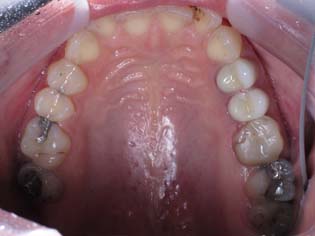
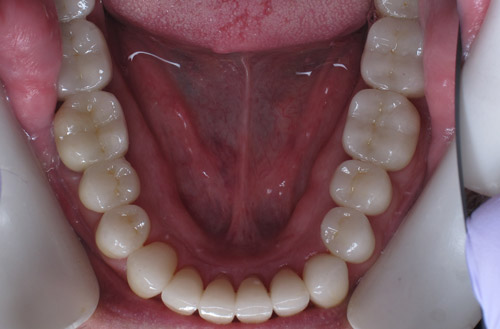
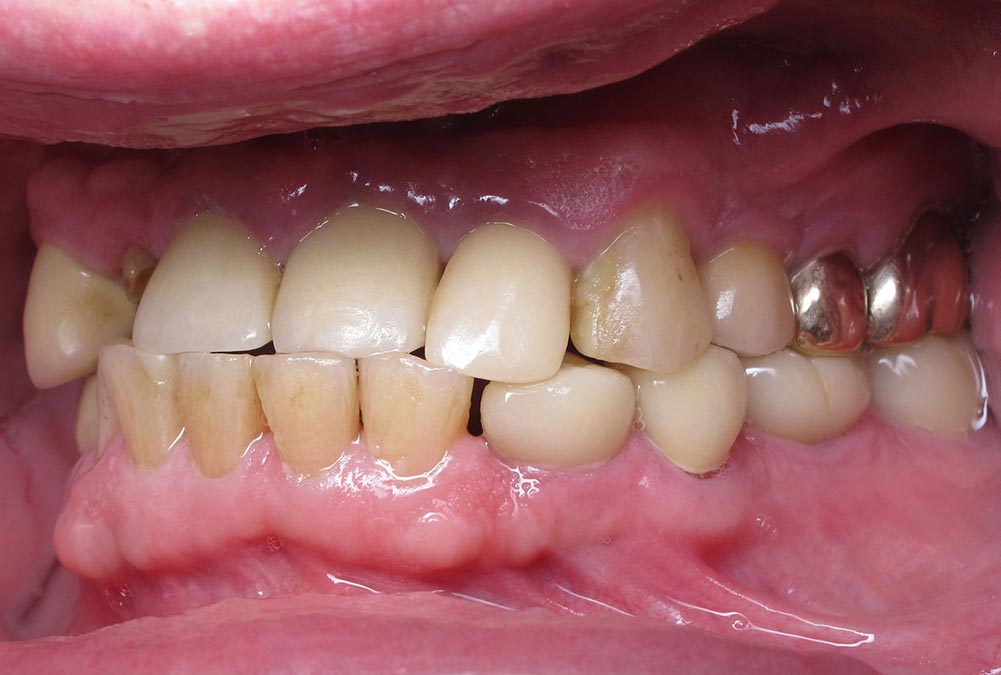
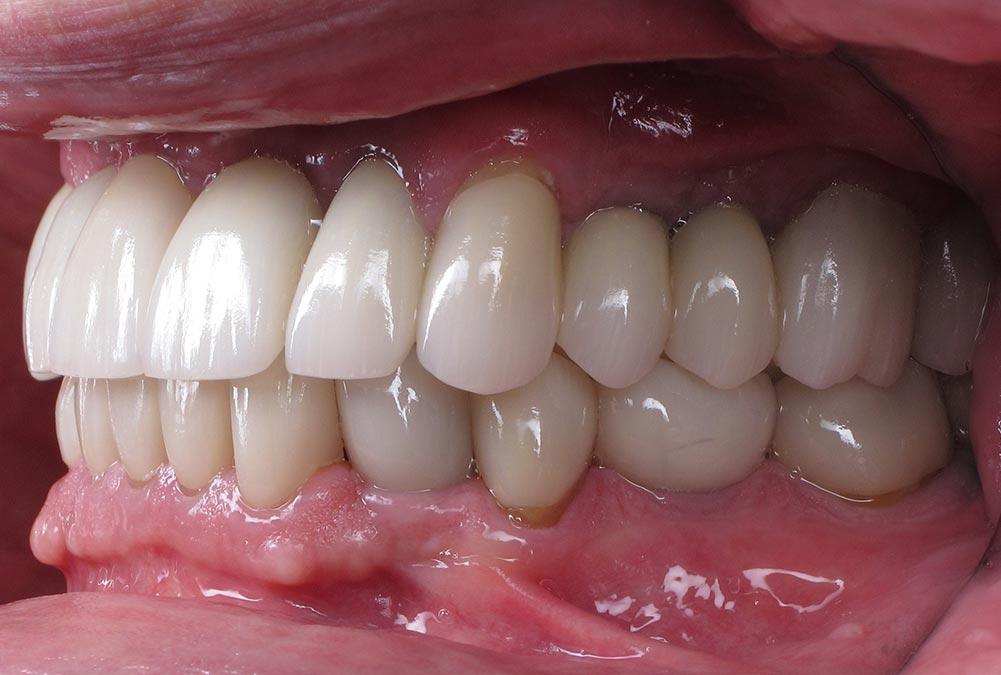
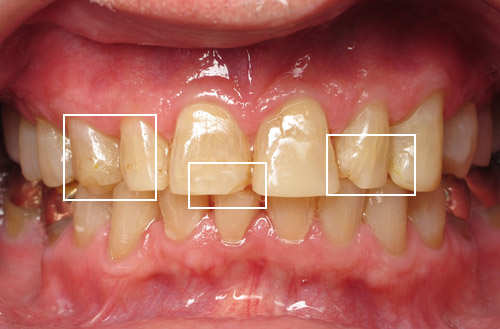
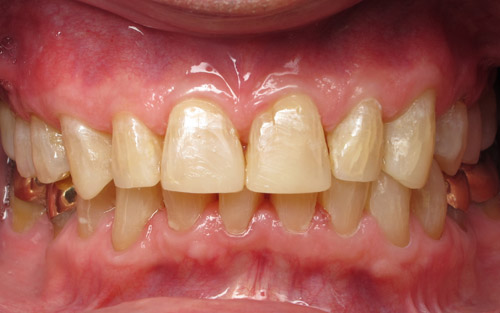
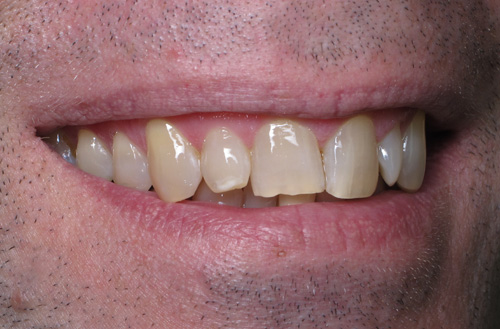
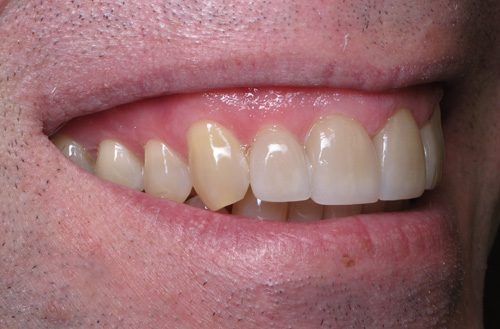
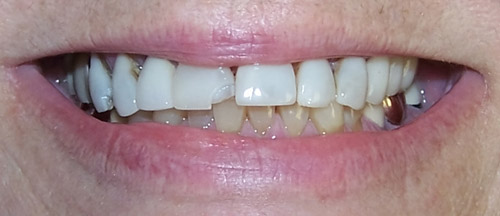
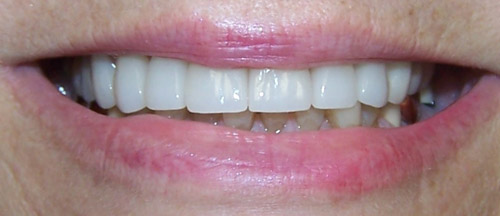
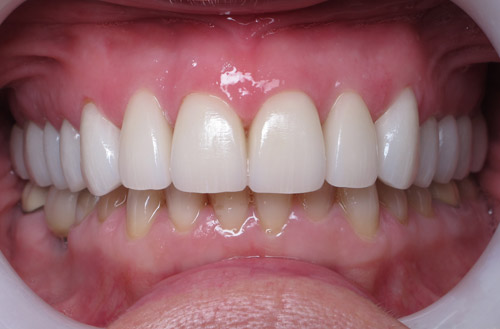
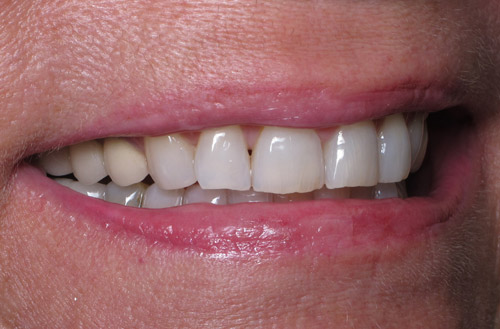
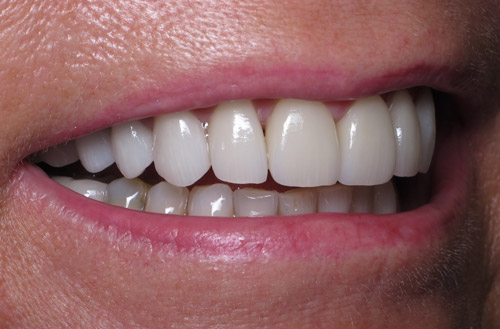
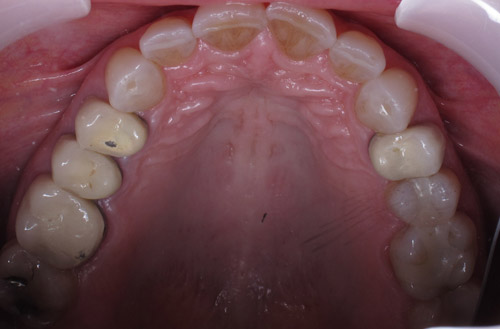
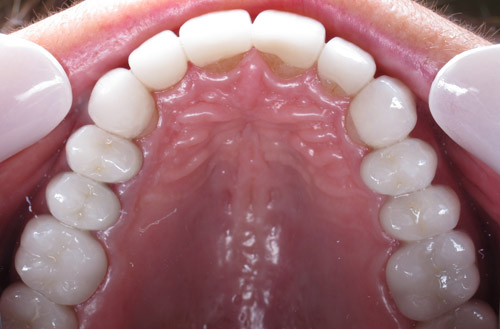
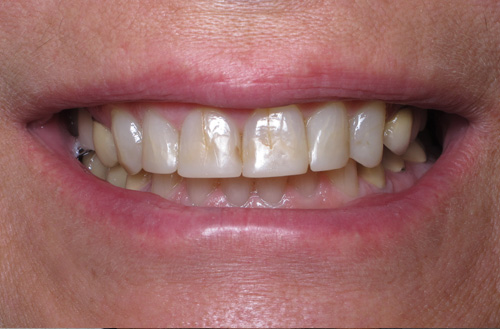
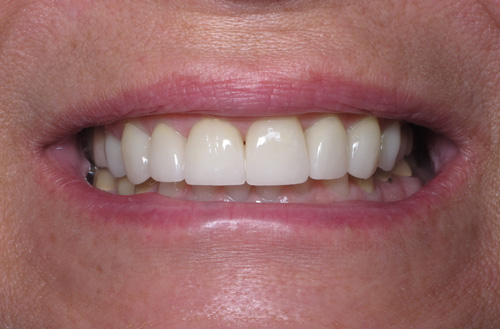
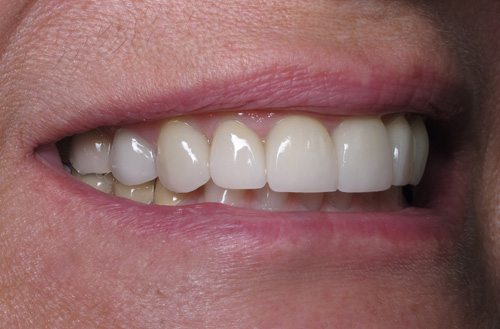
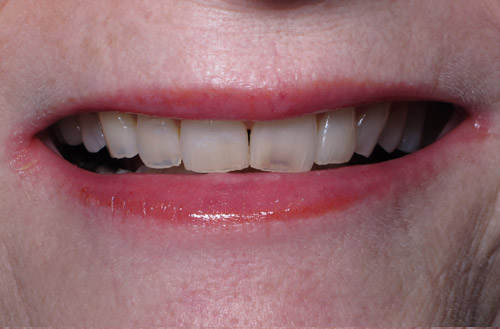
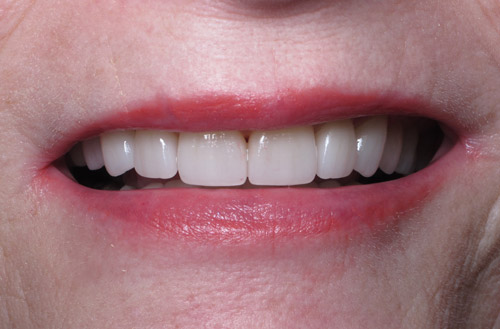
This patient was ready for a change! She wanted to brighten her smile, get rid of the poorly fitting old restorations on her front teeth and cover the fractures in her enamel. To accomplish her goals and save on expenses, we first decided to recontour all of her old restorations on the upper and lower front teeth and go through KöR® Whitening to see if the outcome would limit the need for restorative dentistry. After completing KöR, it was decided the shape and color of the lower front teeth was good, so they would not require any more dentistry. Next, the decision was made to do eight crowns or veneers on the upper front teeth.
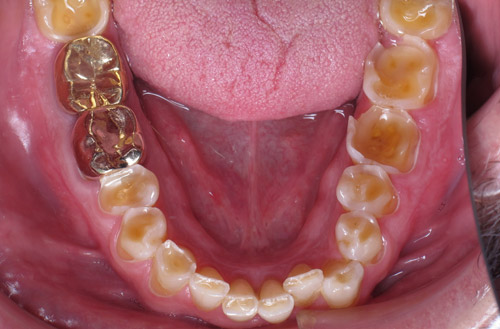
Notice that well-made, all-ceramic restorations can look very natural, unlike the old existing metal/ceramic crowns in the posterior teeth. The darkness visible at the gumline in the lower right is metal showing through where ceramic has chipped off the underlying substructure of an old crown.
Veneers
Veneer restorations seal and brighten fractured teeth.
Case #1
This wonderful patient came to us with an issue with her bite. She could never find a repeatable position when she closed down. Together, we decided to treat her teeth cosmetically and functionally by changing the shape of the tops and fronts of the teeth. This involved doing a comprehensive workup and designing her new smile, placing restorations on her upper teeth and adjusting her lower teeth. Now, all of her teeth touch at the same time when she closes, and she has a beautiful smile!
Case #2
This sweet lady has a great smile, but her teeth were facing significant wear and enamel breakdown. The upper front eight and lower front six teeth were restored with veneer restorations to seal the fractures and brighten their color.
Case #3
For this patient, the upper front four teeth were restored with veneers and custom shade-matched to create a natural appearance. Additionally, the gum tissue was sculpted so all of the teeth would be the same length.
Case #4
A minor case with a gap between the front two incisors and some moderate discoloration. Gaps between teeth make it easy for food and bacteria to collect, which can promote deterioration. With the placement of veneers, the gap is closed, giving a new, clean smile.
Case #5
Gum tissue leveled and teeth slenderized.
This individual was missing two front teeth; her canines were next to her front two teeth instead of at the corners of her mouth. Corrective gum surgery was used to make all the tissue symmetrical around the teeth, and the canines were slenderized to create the illusion that they are smaller. Once completed, veneers were placed over the front 8 teeth to make a fuller, brighter smile.

 Call Us Today!